Please FOLLOW US on Pinterest and LIKE us on Facebook

School Ideas..We have fun name decals, Backpack Name Tags, Teacher Gifts, Wall Vinyls..

Showing posts with label Dessert. Show all posts

Friday, January 29, 2010

Chocolate Brownie Footballs

Are you ready for some FOOTBALL?????????
I am....I lovvve this time of year..Cool, Crisp
mornings, beautiful color from the trees &
FOOTBALL SEASON!!!!!! And then all the great
traditions, family, & HOLIDAYS!!!!

Everyone is thinking about what kind of foods
to have at their next get together..whether a
"Tailgate Party" (or just having friends
over anytime..)

You don't want to be in the kitchen..you
want to be with family & friends..& enjoying
the memories your making. So with that being
said I am going to be giving you some recipes that
hopefully make a 'Touchdown" at your next get
together.

You can make these the day before. These Chocolate
Brownie Footballs are adapted from Betty Crocker.
Thanks Betty.

RECIPE
1 box of your favorite brownie mix (Lg size)
(water, eggs, & vegetable oil called for on mix)

1 tub of white frosting or icing in a tube

Chocolate Ganache
4 (1 oz) semi-sweet chocolate squares
1/2 c. heavy whipping cream
3 Tbsp. butter

Directions:
1) Heat oven to 350F. Line a 9"x 13" pan
with foil so that foil extends about 2" over
short sides of pan. Grease bottom only of
foil with cooking spray. SEE BELOW


2) Make & bake brownies as directed on box for a
9x13 pan using water, oil & eggs. COOL for 1 hr.

3) When cooled take out of pan with foil & flip over on to surface (breadboard, etc.) for cutting out the
footballs.

Peel off aluminum foil and make a template of a
"Football" (abt 3 1/2" x 2") SEE BELOW

If this is all you want to do then just use white icing
to put "Laces" on the football & your done.
OR
4) If you would like to make a ganache then proceed
with taking 1/2 c. heavy whipping cream, 3 Tbsp.
butter getting it hot on stove. (watching to not burn)
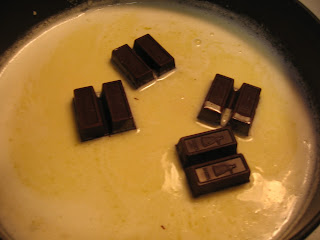
Add semi-sweet chocolate squares & blend together
to make ganache. SEE BELOW


It should have a beautiful glisten.


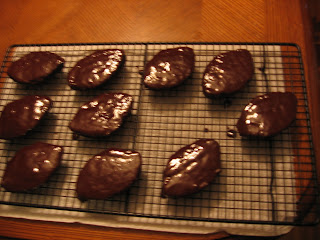
5) BELOW shows the way I did the dipping.
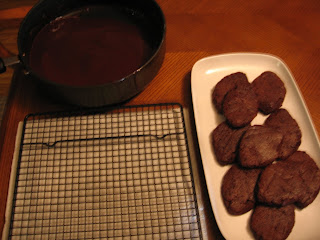
I hand dipped one side of the brownie & put on
cookie rack to dry.
Then after they have dried I put white frosting
into a icing bag (with a small round hole tip) &
decorated the footballs with "Laces." I was happy
with the way they turned out..and they were a big
hit with friends & family.

Wednesday, January 27, 2010

Chocolate Peanut Butter Brownies

Who can resist a Chocolate Peanut Butter
Brownie???? These are actually very similar to
the Chocolate Mint Brownies click here we
did a few months ago.

These turned out to taste really good...They
are a little rich but you can control that by the
the size you cut each one. Hope you like
them.. P.S. These would be a great addition
to any Super Bowl Party.
RECIPE
Bottom Layer:
1 c. flour
1/2 tsp. salt
1 c. sugar
4 lg. eggs, beaten (FYI: the original recipe in
Cooking Light replaces 2 of these 4 eggs with
1/2 c. egg substitute...that's what I did for this
recipe)
1/4 c. butter, melted
2 Tbsp. water
1 tsp. vanilla
8oz. chocolate syrup (1/2 of a 16oz. can)

Peanut Butter Layer
2 c. powered sugar
1/2 c. butter, melted
1/2 c. peanut butter
2 Tbsp. milk (I used non-fat, but you can
probably use whatever you have)

Chocolate Glaze
3/4 c. semisweet chocolate chips
3 Tbsp. butter

Directions:
TO PREPARE BOTTOM LAYER:
Combine flour & salt..whisk set aside.
Combine sugar, 1/4 c. melted butter,
2 Tbsp. water, vanilla, eggs & chocolate
syrup in a medium bowl; beat with mixer
til smooth. Slowly add flour mixture to
chocolate stirring until blended.

BATTER WILL BE THIN! Pour batter
into 13 x 9 inch baking pan coated with
cooking spray.

BAKE at 350F. for 23 min. or until a
wooden toothpick inserted comes out
almost clean. COOL completely in pan
on wire rack.

PREPARE PEANUT BUTTER LAYER:
Combine powdered sugar, 1/2 c. melted
butter, peanut butter, & milk. SEE BELOW:

Make sure bottom layer is completely COOLED
before frosting..
Frost bottom layer with Peanut Butter filling as
seen BELOW:
TO PREPARE CHOCOLATE GLAZE:
Combine the chocolate chips & 3 Tbsp. melted
butter in a medium microwave-safe bowl.
MICROWAVE ON HIGH for 1 minute or
until melted.(stirring every 30 sec) Let stand
2 min.

Spread chocolate mixture evenly over the top.
Cover and refrigerate until ready to serve.

Cut & Serve...and Enjoy the delicious taste.

Thursday, December 17, 2009

Chocolate Trifle Dessert Plus More Ideas for your Home

Here it is...One of the easiest elegant desserts
I know how to make! You can too!

Impress your guests with this "Chocolate Trifle
Dessert" We had it at our annual Christmas Party
& people were coming back for 2nds & 3rds...Yahoo!!...
I love it when people are eating, laughing, having a
great time...making wonderful memories...
(it was our 20th yr.) We have the best friends!!!
We feel so blessed....

It looks the best in a Trifle Bowl such as this
because you can see the layers better. You can get
the bowl @ Target, Walmart (places like that)

It's a really easy/fast recipe...so I wanted to
share it with all of you...Merry Christmas!

Recipe
1 pkg. Brownie mix
1 6oz. pkg. Chocolate Instant Pudding (Sugar Free)
(it's what I had on hand)
1 6oz. pkg. Vanilla Instant Pudding (Sugar Free)
(again it's what I had on hand)
3 Baby Ruth candy bars (sliced)
3 Heath candy bars (broken in pieces)
1 12oz. Cool Whip & 1 8oz. Cool Whip (or 2 8oz.)

Make brownies according to pkg. direction (set aside)

Make Chocolate Instant Pudding according to pkg.
(pour 1/2 into bottom of Trifle bowl to make
bottom layer)

Break up (in your hands) cooled brownies & put
1/2 on top of Chocolate pudding

Top that with 10oz. of Cool Whip
Put the rest of the Chocolate Pudding on top
of Cool Whip layer

Put (crushed or broken pieces of Heath bar) for
next layer (It won't cover all...that's OK)

Make Vanilla Instant Pudding (according to
pkg.) & put all of it in bowl as the next layer

Next...put (sliced) Baby Ruth Candy bars as the
next layer...Put the rest of the crumbled brownies
on top of that.....

Finish with the rest of the Cool Whip & put a
Christmas Flower on top & refrigerate for 3hrs.

ENJOY!!!!!!!!
In the photo below is the easiest way to dress
up kitchen stools for the holidays....Just measure
across the top of the stool add a few inches to the
circle (or you could cut a square) & tie with ribbons!

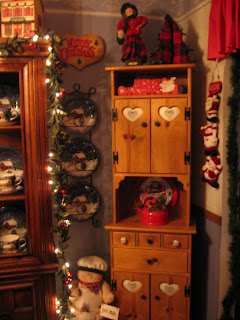
This is our heart cross-stitch hutch..
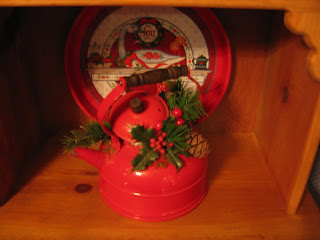
I love it...I found a Red Kettle a long
time ago & love to pair it w/the
Red Christmas Swan...

This is a toy soldier (out of wood) I
made for Santa's Gift Shoppe Boutique
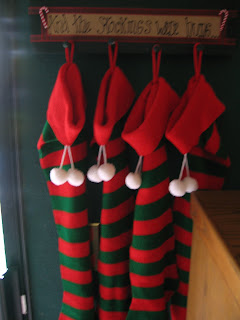
last year....Also below "And the
Stockings were hung" w/4 stockings
was @ Santa's Gift Shoppe, too last year!
And last.....is an idea on giving an
EASY/CUTE Gift Box along with
the gift inside!!!
These were what we gave to our Party
Guests last Friday...I love to dress
gifts up with a BIG Ribbon & BOW...
I got these cute gift boxes @ Oriental
Trading Co.....Santa's & Snowmen!!!!
Their so cute all together....I did a close up
so you could see the great detail in the faces...
Well....Hope you got some NEW IDEAS that
will brighten up your Christmas Holidays!!!!

Saturday, September 26, 2009

Easy/Fast Cherry Cobbler "a la mode"

Doesn't this look yummy?????? It tastes
even better & it's the easiest, fastest dessert
to do. We went to a dinner party at some
friends house tonite and this is what I brought.

They had us make individual pizzas, with a
huge assortment of toppings and our
great host/chef barbecued them in his wonderful
outdoor Bar-B-Q pit/grill restaurant type patio
(which he built himself I might add)
He & his wife are amazing and their food
absolutely delicious. That was probably the
BEST pizza I've ever had.....Wow!

Anyway sorry about digressing....This Cherry
Cobbler topped with vanilla bean ice cream
(and it could be apple or just about any
type of fruit probably) recipe came from a
dear friends mother.
It only has 3 ingredients to boot.....


Recipe

1 reg. size can Comstock pie filling (cherry
or apple)
1/2 box of white or yellow cake mix
1/2 c. butter (1 cube) melted


In a 8"x8" square pan (that has been buttered or
sprayed with Pam) pour the can of pie filling into
it.

Sprinkle 1/2 the box of cake mix evenly over the
pie filling.

Pour approx. 1/2 c. (1 whole cube) of melted
butter as evenly as possible over the cake
mix (I used a Tblsp to make it easier)

Bake @ 350F. for 25min.
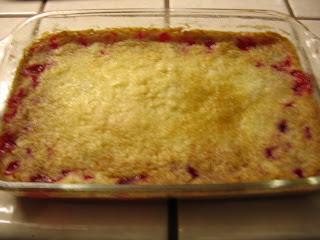
This is how it looked after coming out of the oven.
Add the "a la mode" ice cream and that's it......

NOTE: (I made some changes for this recipe)
**********I used a 11 x 7 1/2" glass pan because I
knew I needed more servings than an 8x8 would
yield.
**********I used a large can (30 oz.) of Pie filling
and all of the cake mix (I didn't want any left
over)
**********I used the same amount of melted
butter as the recipe

***ALERT....FREE GIVEAWAY COMING****
*****************SOON*********************
**Check back often so you don't miss out!!!!

Monday, September 14, 2009

HOMEMADE ALMOND JOY BARS

Wow.....These are great!...These taste like
the wonderful Almond Joy Bars we had when
we were kids....They still have those....They were
my mother's favorite.....

The roasted almonds are out of this world mixed
with the sweet coconut, chocolate, and graham cracker
crust...Wow...It's a great dessert. The recipe
comes from Better Homes & Gardens magazine...

******I did a couple of things that you should not do.
I used a smaller size pan (7x11x2) because that's all
I had available....I found that it made the top layer
of chocolate so thick I had a harder time cutting them.


RECIPE
2 c. graham crackers
1 1/2 c. whole almonds
1/3 c. brown sugar
2/3 c. butter, melted
1 14oz. pkg. flaked coconut
1 14oz. can sweetened condensed milk
18 oz. dark chocolate pieces, melted


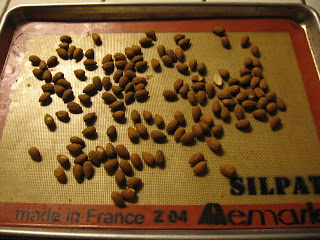
The photo above shows the whole almonds before
they go into the oven to roast...
*********To roast nuts spread them in a
single layer in a shallow pan. Bake in a
pre-heated 350F. oven for 5-10 min. or
until nuts are slightly golden brown, stirring
once or twice.

Directions:
1. Preheat oven to 350F. Place graham crackers
crumbs, 1/2 c. of the almonds, & brown
sugar in a food processor or blender. Cover
& process until almonds are finely chopped.
Add butter, cover & pulse 4 or 5 times or
until mixture is well combined. Press crumb
mixture into bottom of an ungreased 13x9x2 inch
baking pan. Bake in preheated oven for 12 min.
Cool on wire rack.


2. Combined coconut and sweetened condensed
milk in a medium bowl. Spread mixture evenly
over crusted crust. Sprinkle remaining almonds
evenly over coconut layer. Bake 10 min.

****To melt chocolate pieces, place into a
micro-safe bowl. Microwave @ 50% power
(medium) about 3 min. or until chocolate
is melted & smooth stirring once or twice...

3. Spread melted chocolate evenly over top of baked
mixture . Cool completely in pan on wire rack or chill
in refrigerator until the chocolate is set. Cut into bars.
Enjoy.........

To store: Place bars in a single layer (in an airtight
container); cover. Refrigerate up to 1 week or freeze
for up to 3 months. Let stand 30 min. before serving.

Wednesday, August 19, 2009

Chocolate Mint Walnut Brownies


I have had such a Great response........to the
Chocolate /Mint Brownies I posted in July
I thought I'd post another one ..........but this
recipe is a lot Faster...& Easier......

These are one of the food items that will
be at my house at the Santas Gift Shoppe
Boutique coming up..(Dec. 3rd & 4th 2010)

These taste
incredible........Mint & Chocolate
just are the BEST combination together....

I
found this recipe on the back of a Brownie
Mix a very long time ago..and every time I make
them for an event or party....they always are a
hit......So, now you can get all the compliments
by making these little gems.....

Recipe

1 box "Duncan Hines" 21oz. Brownie Mix
(Chewy Fudge) Follow instructions
on the back of the box
1 16 oz. can vanilla frosting
a few drops Green food coloring (to your preference)
or ("icing colors" Kelly Green) a toothpick dab
a few drops of Peppermint extract flavoring
1 c. walnuts chopped in lg chunks (optional)
1 c. chocolate sprinkles (optional)


Follow directions on brownie mix for "fudgy"
brownies (be careful to read about metal/glass
pans vs. dark & non-stick pans...timing is a
little different)......

While brownies are cooling in the pan.....
take
the can of frosting and put it in the microwave
(about 10 sec or so) to make it more spreadable...
***You do not want it liquidity....

****You can do the next step right in the can if
you want to......

Add a few drops of
peppermint extract
and
a few drops of green food coloring/or toothpick
dab of kelly green "Icing Colors" to the can of
frosting & stir until you get the green you like...

After brownies have completely cooled....spread
frosting with a "beveled spatula" (this is the
Best kitchen tool to spread frostings I have
found......It looks like a bent long knife without
the sharp edges..)

A
dd chocolate sprinkles on top (if desired)
Look at both photos (above) to see which you like
better...Enjoy......

Monday, July 20, 2009

Delectable Peanut Butter Cup Cookies

This is a LOADED CHOCOLATE /PEANUT
BUTTER CUP COOKIE....Loaded with Reese's
Pieces, Mini Reese's Peanut Butter Cups,
Chocolate Chips, Peanut Butter & a Chocolate
dough...Wow that's chocolaty.......

These would be great for a special occasion.
I found these on a number of blogs, pretty much
the same recipe, This one was adapted from
Kitchen Cafe ....(I didn't put the 1 cup of peanut
butter chips that was in the original recipe & you
may want to do that)....

Ingredients:

1 Cup Butter, (softened)
3/4 C. Peanut Butter (creamy or crunchy)
(I used crunchy)
3/4 C. Sugar
3/4 C. packed Brown Sugar
2 Eggs
1 tsp. Vanilla
2 1/3 C. Flour
1/3 C. Cocoa Powder (I think I would use not
as much..... maybe 1/4 -1/2 Cup)..you decide
1 tsp. Baking Soda
1 Cup Semisweet Chocolate Chips
1 Bag Reese's Pieces

~Note: Cut the Peanut Butter Cups in half
(gently) and put in refrigerator or freezer
til ready to use. Original Recipe said to
freeze first.......(but 1 blogger stated she had
problems cutting them after they were
frozen)....we don't want problems like that...

Preheat Oven to 350F.

In a large bowl or stand mixer, cream together
softened butter, peanut butter, white sugar, &
brown sugar until smooth. Beat in eggs one at a
time, then stir in vanilla. Combine flour, cocoa,
& baking soda; stir into the creamed mixture.
Mix in chocolate chips, & Reese's Pieces (hand
stir them in so the shells of the Reese's Pieces don't
get broken).

I used a Cookie Scoop to have each cookie round &
look more uniformed. I also used a Slipat Cookie
sheet liner...(they are the BEST non-stick liners!!!)
These are 2 of my Favorite Kitchen Items......

Push one Peanut Butter Cup half into the center of
each ball of dough. Bake for 8 to 10 min. (My oven
they were done at 9 min. (You don't want them to
fall apart so make sure you let them cool completely
before lifting them off the cookie sheet).....

Monday, July 13, 2009

Chocolate Mint Brownies

Oh my gosh...These are simply THE BEST
BROWNIES I've ever tasted and the family
agrees! Believe it or not these little babies
came from Cooking Light!!!You might think by
looking at them that they might be heavy, but
they are light tasting...I have made a lot of different
kinds of mint brownies....but these are #1.....
You be the judge and let me know what your
family thinks........I LOVE COMMENTS!!!

My husband went to have one and said, "These
are REALLY GOOD." Then while savoring the
delicious taste....he must have said "No, I mean
these are REALLY REALLY GOOOOOOOOD,
12 times.... The rest of us agree and they were gone
REALLLLLY FAST!!!

NOTE: THESE WILL DEFINITELY BE AT
THE SANTA'S GIFT SHOPPE CHRISTMAS
BOUTIQUE (in my home)
Dec. 4th & 5th 2009
~~IF INTERESTED IN COMING & WOULD
LIKE an INVITATION.....email me @
santasgiftshoppe1@hotmail.com


RECIPE
Bottom Layer:
1 c. flour
1/2 tsp. salt
1 c. sugar
4 lg. eggs, beaten (FYI: the original recipe in
Cooking Light replaces 2 of these 4 eggs with
1/2 c. egg substitute)
1/4 c. butter, melted
2 Tbsp. water
1 tsp. vanilla extract
1 (16 oz.) can chocolate syrup (if you can only
find this in a bottle you have to weigh it on a
kitchen scale = 16oz.)

Mint Layer:
2 c. powered sugar
1/4 c. butter, melted
2 Tbsp. milk (I used non-fat,but you can
probably use whatever you have)
1/2 tsp. peppermint extract (you may want
to up this to 1tsp.)
2 drops green food coloring

Glaze:
3/4 c. semisweet chocolate chips
3 Tbsp. butter

1) Preheat oven to 350F.

2) TO PREPARE BOTTOM LAYER: Combine
flour & salt.... whisk set aside. Combine sugar, 1/4 c.
melted butter, 2 Tbsp. water, vanilla, eggs, & chocolate
syrup in a medium bowl; beat with mixer til smooth.
Slowly add flour mixture to chocolate stirring until blended.

BATTER WILL BE VERY THIN! Pour batter into
13 x 9 inch baking pan coated with cooking spray.
Bake at 350F. for 23 min. or until a wooden toothpick
inserted in center comes out almost clean. Cool
completely in pan on wire rack.

3) TO PREPARE MINT LAYER: Combine
powered sugar, 1/4 c. melted butter, & the rest
of the mint layer ingredients. MAKE SURE BOTTOM
LAYER IS COMPLETELY COOLED BEFORE
FROSTING....Frost bottom layer (I then put
it in the refrigerator to set)

4) TO PREPARE GLAZE: Combine the chocolate
chips & 3 Tbsp. butter in a medium microwave-
safe bowl. Microwave on HIGH for 1 minute or
until melted, (stirring every 30 sec.) Let stand
2 minutes. Spread chocolate mixture evenly
over the top. Cover and refrigerate until ready
to serve. Cut into 20 pieces or cut the 20 in half
and make 40 smaller ones.

Friday, July 10, 2009

Strawberry Parfait Dessert

This is the Perfect Dessert for Summer.....
especially if you want something refreshing.....
and lite. It tastes so gooooood when it's hot outside.
You just have to give it try and let me know what you think.

I found this in Food & Family from
Kraft Foods a number of years back.....They have
the best articles....recipes and ideas on how to save
money on food.

The Top photo shows the layers better (I only
blended
the mixture for about 15 sec. in that one,
but it wasn't as easy to pour as when I blended for
30 sec.,
but it didn'tshow the layers as well.


We made this 2 ways (the way the recipe calls for
and the way my husband wanted it)
I like his way better...with the Reddi Whip (in a
can) and a cherry on top.

We wanted you to see the difference and be able
to pick the way you like it better. It makes its own
layers of light & fluffy gelatin while cooling in the
refrigerator. I forgot to mention that it is the fastest
dessert to make as well. It only took about 5 min.

RECIPE
1 Pkg. Strawberry flavor Gelatin (0.3oz.)
3/4 c. boiling water
Ice cubes
1/2 c. cold water
1/2 c. thawed Cool Whip

Dissolve dry gelatin mix in boiling water in bowl or
saucepan...(I did it in a saucepan)

With a Lg. (2cup) Measuring Glass put cold water to
the 1/2 c. line and add ice cubes to make it 1 1/4c.
Add to gelatin mixture, and then pour mixture into
blender; cover and blend 30 sec.

Add whipped topping to blender and blend until
smooth.

Pour evenly into 4 dessert dishes.....or Parfait
glasses (we used goblets and I think it looks more
elegant and beautiful that way but you choose for
yourself...

Refrigerate 20 min. or until set. Store leftovers in
refrigerator. Makes four servings but I would pour
less in each glass (than is shown here) because this just
made 3 servings and it should have made 4.

For reduced calories...Use Sugar Free Jello

Wednesday, July 8, 2009

Caramel Delites Bars (Samoa taste-alikes)

Don't you just LOVE Girl Scout Cookies?????? We
do & so when I found this recipe on a number of blogs,
(I found this on lovetoeat weblog) I knew I had to try it
out....It does taste just like them, so if you like
shortbread, coconut & caramel, drizzled
with chocolate...your going to love these...

***Note...These taste alot like the Samoa cookies
but much easier (with less steps) to do.

They are a GREAT DESSERT!!!They do take a bit of
time though because you need to let them cool in between
each step, but everybody says it's worth it.


Recipe
Cookie base:
1/2 c. sugar
3/4 c. butter (softened)
1 large egg
1/2 tsp. vanilla
2 c. all purpose flour
1/4 tsp. salt

First, make the crust. Preheat oven to 350F.
Lightly grease a 9 x 13 inch baking pan. In a
large bowl, cream together sugar & butter,
until fluffy. Beat in egg & vanilla extract.

Working at a low speed, gradually beat in the
flour & salt until mixture is crumbly....(Mine
was more like a dough but I don't think it makes
that big a difference....)Pour dough mixture into
prepared pan & press firmly to make a even
layer. Bake for 15-20 min checking to see when
the middle is set & edges are lightly brown. Cool
completely before topping...

TOPPING:
3 C. shredded coconut
1 pkg. 14oz. caramels (I used the Kraft brand)
1/4 salt
3 Tbsp. milk
1c. semisweet choc. chips (to drizzle on top)

Preheat oven to 300F. Spread coconut evenly
on a parchment-lined cookie sheet (I used a
Slipat liner) preferably a cookie sheet with sides.
Toast the coconut 15-20 min. stirring every 5 min,
until coconut is golden brown (mine only took
15 min....I have a hot oven....go by what your
oven does) Cool on cookie sheet. Set aside.

Unwrap the caramels & place in a lg. microwave-
safe bowl with the milk & salt. Cook on high
approx. 3-4 min (it took mine almost 3) stopping
to stir a few times to help caramel melt. When
smooth fold in coconut with spatula. Put dollops
of mixture all over shortbread base. DO THIS
QUICKLY BEFORE CARAMEL STARTS TO
COOL. Using a spatula spread topping to make an
even layer. Let topping set until cooled.

When cooled, cut bars (with sharp large knife) into
30 small bars or 15 larger bars. Once bars are cut,
melt chocolate into Sm. microwave-safe bowl. Heat
on high for about 30sec. intervals, stirring thoroughly
to prevent scorching. (SEE TIP) Drizzle the melted
chocolate on top of bars in diagonal lines.

TIP: Place a baggie in a cup & spoon melted
chocolate into baggie..
pick up baggie & snip a tiny
hole in the corner of the baggie. Drizzle a diagonal
design (on the cut bars).....Let chocolate completely
cool (even put them in the fridge if needed for a short
time) before storing in airtight container........Enjoy!!

Saturday, July 4, 2009

"Happy 4th of July"

This is a great recipe that I found many years ago in
the Family Circle magazine...Happy celebrating!

This bowl is called a Trifle bowl and you can find it at
Kmart, Walmart, or Target for around $10-12 (when on
sale) It has proven to be one of my favorite display bowls....

4th of July Dessert
4 cups water
1 pkg. (8oz.) Blue Flavor Jello
1 pkg. (8oz.) Red Flavor Jello
2 cups cold water
1/2 loaf pound cake or angel food cake
1 tub (8oz.) Cool Whip - thawed
3 med. bananas

Stir 2 c. boiling water into each flavor of gelatin
in separate bowls for 2 min. until dissolved.
Stir 1 c. cold water into each bowl
Pour into separate 13 x 9" pans. Refrigerate 3 hrs.
or until firm. Cut each pan into 1/2" cubes.

Cut bananas into slices. Place Blue jello cubes into
trifle bowl, layer cake cubes, put 1/2 of the Cool whip
& bananas in bowl. Cover with Red jello cubes. Garnish
with remaining Cool whip & banana slices.
Refrigerate at least 1 hr. or until set (refrigerate
any leftover dessert)

(makes 12-15 servings)

(For low cal. substitute SugarFree jello, Lite cool whip,
Angelfood cake)