Come check out our newest item for Picnics, Labor Day Parties, Tailgating, Family Reunions, Fun at Home or a just a great Christmas Gift! HERE IS THE LINK TO IT..CLICK HERE
It's our new 4 some of Mickey & Minnie Mouse Condiment Bottles: Ketchup Mustard Relish Mayo They're so much fun and the kids will love them, too!
School is right around the corner. Here are some
of our ideas to make it more fun. Laptop stickers,
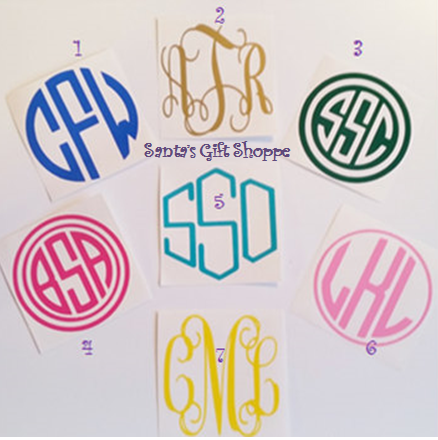
Cell Phone Monograms, Teacher Gifts, Pencil
Boxes & Pouches, Personalized Sport Helmets,
Personalized Names, Water Bottles & Journals.
To get connected to our Etsy Store: https://www.etsy.com/shop/santasgiftshoppe
HALLMARK CHANNEL is having their CHRISTMAS in JULY with "CHRISTMAS KEEPSAKE WEEK" of
wonderful Christmas Movies. So we are going to celebrate
with them for 1 week (7/14/17-7/21/17) with a SALE
of $5 OFF a $25 purchase from santasgiftshoppe ETSY Store.COUPON CODE: XMASINJULY2017
Below are some of the decals we have for Christmas
but everything in the store is included in the sale.
Here is a link to the STORE.... CLICK HERE


