Please FOLLOW US on Pinterest and LIKE us on Facebook

School Ideas..We have fun name decals, Backpack Name Tags, Teacher Gifts, Wall Vinyls..

Showing posts with label Breakfast. Show all posts

Tuesday, February 23, 2010

Update on Foodista Blog Cookbook Contest/Omelets made Easy

Before we start talking about "Omelets made Easy"
I wish to express to all of you my heartfelt
Thanks for all your support & encouragement with
the "Foodista Blog Cookbook Contest."

There are only a few days left to "Vote" if you would
like to help me out with the Contest (it closes.....
Feb. 28th 2010) You can connect to the "Foodista"
Blog by clicking on their Button on the sidebar.

This will take you to their website & where my
entries are... & you can "Vote." You guys are
wonderful... Have I told you that lately???
Thank You Again!!!

Now...
"Omelets made easy"...
Ingredients:
2 tsp. butter
2 lg. eggs
1/4 c. milk or water (I used water)
1 c. sliced fresh mushrooms
1/2-1 c. shredded cheese (I used Mexican blend)
dash salt/pepper

Directions:
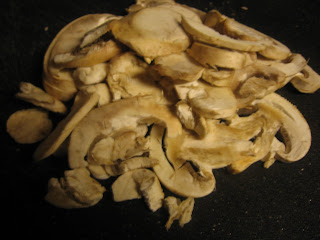
1) To Saute Mushrooms....Take a frying pan
(I like the slanted side one) Place pan on Med/High
heat & put 1 tsp. butter or margarine.. melt & add
(rinsed & paper towel dried) mushrooms.
SEE BELOW: (2 photos)

2) Sweat Mushrooms...Cook mushrooms for
a few minutes until their have lost some of their
water by "sweating" (They should be soft & shiny)
Don't overcook...Set Aside

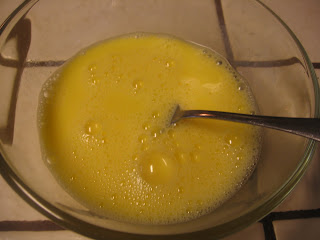
1) To Make an Omelet:...Take 2 eggs & beat
with fork (when blended well) add 1/4 c. milk or
water (I used water) & beat until frothy..(The air
inside will make it fluffier)...
SEE BELOW:
2) Heat up pan on Med/High heat & add 1 tsp. butter
or margarine until melted (I pick up the pan and swirl it
around til bottom of pan is covered (so the omelet
won't stick) See Below:

3) Add egg mixture into pan...add salt/pepper

4) After adding the egg mixture...take a pancake type
turner & start "pulling" (the mixture from the middle out)
to make a hole in the middle & keep filling it up with egg
from the sides that are still "runny" until it all starts to
firm up a little...SEE BELOW:

5) Sprinkle 1/4 of cheese over egg mixure....

6) Add sauteed mushrooms & any other veggies
(slices of bell pepper or tomato) to one side of the
omelet & almost the rest of the cheese (save enough
to sprinkle on top of omelet)...SEE BELOW:

7) Take Turner & slide around the edges to make
sure the omelet will turn smoothly & not stick..
Turn the half of the omelet (that doesn't have the
filling on it) over to the other side (to make a half circle)
Sprinkle rest of cheese on top...SEE BELOW:

8) This is an important step: Cover pan with
paper plates or a pan cover & put in microwave...
(DO NOT TURN IT ON!) It's just to trap the
heat in a small area so the cheese will melt on top

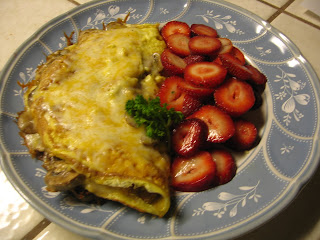
9) After a few minutes cheese should be melted
on top


You did it!!! Enjoy.........
Sunday, January 3, 2010

How to make Aebleskivers (Danish Pancakes)

Well the title of this post is:
How to make Aebleskivers....It's even
hard to pronouce but I hope to
show you how through this tutorial.

THE TOP PHOTO SHOWS YOU THE END
RESULT (or what we hope they will look like)
with a selection of my homemade jams: Straw-
berry/Boysenberry, Strawberry/Raspberry/
Blueberry, & Strawberry/Blackberry..Ymmm!!

This is a family tradition I remember my
mother making these a lot..not just at Christmas..
but all the time!! She was Norwegian (& was
raised by her Norwegian grandmother who
did not speask any English)

One of her favorite places was Solvang (a Danish
Community by Santa Barbara/Buellton area..
Calif.) where she got her pan (as well as I did)

According to Wikipedia, Aebleskiver
(Danish meaning apple slices, are traditional
Danish pancakes in a distinctive shape of a
sphere) They have been described as a cross
between a pancake & a popover... They are light
& fluffy & delicious with jams & confectioners
sugar or syrup & butter...

RECIPE

Mix together:
1 1/2 C. Flour
1/2 tsp. Baking Soda
1 Tbsp. Baking Powder
1/4 tsp. Salt

Beat together with a whisk or fork:
1 C. Buttermilk
2 Eggs
1 C. Sour Cream

Below: are some of the dry ingredients (I only
had dry Buttermilk which when mixed with water
is the same as regular buttermilk) I hope that doesn't
confuse you...I should not have had the buttermilk
in the picture or sour cream.


Below: These are the dry ingredients: Flour, Baking Soda,
Baking Powder & Salt in a bowl.

Below: These are the wet ingredients: Buttermilk,
Eggs, & Sour Cream

Below: This is how it looks mixed together (dry
& wet ingredients)

Below: This is the original Aebleskiver Pan..
You can get the original in Solvang or probably
online...Now I see similar ones everywhere..but
I don't know if they heat the same or are as
heavy & sturdy as this one is..It should last a
lifetime.


To Make: Combine the dry & wet ingredients
until smooth..put 1/2-1 tsp. oil in each space in
the aebleskiver pan. (I tried several different
ways: Non-stick spray burnt them, not enough
oil made the outside mushy, butter would probably
burn) The Canola Oil worked well..
Heat the pan until Hot...You should hear
the oil sizzle...before adding the batter.
Below shows you how they bubble like
regular pancakes (when they are ready to be
turned)

This is the tricky part..The Solvang people
say to turn them in 1/4 turns..Which I have tried
to show you here in the following 4 photos.

You can turn them completely over the first
time but it will be a flatter sphere & not as
fluffly inside..It should be round all the way around.

My mother turned them with a knitting needle..I
found a wooden skewer grabbed it the best.
I have seened people use a fork to turn them as well.


Below: This shows you how they should
look when done...Crisp on the outside &
soft/fluffy on the inside...

After you put them on your serving plate sprinkle
Powdered Sugar on top (either with a special
can for sprinkling or take a sifter..here is a smaller
sifter size for rolls & such)

and now dip them into your favorite jam or
melted butter & syrup....is your mouth
watering yet???
AND ENJOY!!!!