Showing posts with label Caramel. Show all posts
Showing posts with label Caramel. Show all posts
Wednesday, April 6, 2011
Family Car Vinyl Decals/Wed. Blog Hop
FAMILIES...We all have them..We all love them (most of the time) A way to show who your family is, is to have Vinyl Decals on your car! You have seen them on cars all around. What I Love... is you can personalize them so much! Hair, Age, Bikes...You can do a Ski Family...Flip Flop Family..Fish Family.. The creativity is endless plus you show the world your pride in your Family (on the window of your CAR) Have I told you lately how much I love making Vinyl Decals? Hope this inspires something in you...Go be creative..Make something... Now it's your turn...what have you been making? You know the RULES...Wednesday Blog Hop Below.. 

Labels:
Caramel,
Eamily,
Vinyl Decal Stickers,
Wed. Blog Hop
Thursday, May 27, 2010
Friday Favorites..Crafts & Recipes
 These are some of my Favorite Things to do...
Make Aprons/Baking....These are for my
ETSY SHOP... This is the Moms, Grandmas,
Aunts, or Friends Apron. The bows are heat
sealed to prevent fraying & are easily removed
for washing. (If interested in purchasing one
you can go to the sidebar & click on the
"santasgiftshoppe"under the ETSY PHOTOS
& it'll take you right to the store)
 This is the Childs Matching Apron
 for daughters, grand-daughters, nieces
or friends...The bows are heat sealed to
prevent fraying & easily removed for
washing. It also has a FREE Rolling Pin
included.(This Matching smaller apron can
also be found in santagiftshoppe.etsy.com
just click on the link & your there)
This weeks Favorite Recipe:
Homemade Twix Bars
(Don't you just love the the
Mary Engelbreit plate..I do)
 I found this recipe on cooks.com under mock
Twix Bars but I prefer to call them Homemade
Twix bars..These are really so goooood..........
This is really an easy recipe with great results.
Another added plus is that they are NO-Bake..
Especially in the Summer I hate to have the
oven on...How bout you?
RECIPE
1 Box of Club Crackers
1 c. crushed Graham Crackers
3/4 c. brown sugar
1/2 c. white sugar
1/3 c. milk
1/2 c. butter
1 c. chocolate chips (I like milk choco. chips for these)
2/3 c. peanut butter
Directions:
1) In a 9 x 13 inch buttered pan put a layer of whole
club crackers. See Photo Below:
 2) In a saucepan combine graham crackers, brown sugar,
white sugar, milk (I used non-fat & it worked fine) &
butter. See Photo Below:
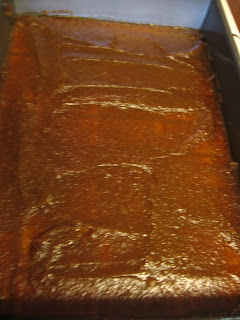
 3) Boil for 5 minutes, stirring constantly. Spread
over crackers..Be careful this is hot!! (I love the
off-set spatula for this) See Photo Below:
 4) Next add another layer of crackers,
& gently press down not breaking any.
Put in refrigerator for 30 min.
See Photo Below:
 5) To make the Frosting: put choc. chips
& peanut butter in a microwave-safe bowl
& melt for 1-2 min. stirring & checking
every 30 sec. after the 1st minute.
Frost crackers & put in refrigerator for 30 min.
See Photos Below:

 6) All Finished..Now to enjoy!!!
Good job!! Have a great Memorial Day!!

Friday, March 19, 2010
Homemade Samoa Girl Scout Cookies
 Oh my Gosh..Oh my Gosh..Oh my Gosh..
Wow!!! These are so good you'll think your dreaming.
Since this is March & Girl Scout Cookie Month..
I thought I would bring you the BEST "HOMEMADE"
version for these cookies I could find. And I
think I may have found it.
I also will be doing a homemade version of
Thin Mints, & Tagalongs (Shortbread, Peanut
Butter & Chocolate in a few days)....
so keep checking back with us!!!
If you Love the Girl Scout Samoas (a.k.a. caramel
delights) like I do....then you are going to want to try
these out for sure. I found this on Baking Bites from
a few years ago.
This version has a buttery shortbread cookie base,
Coconut/Caramel topping (I used Werther's Chewy
Caramels because that is all the store had..but I found
that they have the best flavor..using real butter &
cream) topped off by the perfect balance of
chocolate on the bottom & drizzle on the top
making it The Best Cookie ever! I knew I had
to hurry up & try these out so I could share
them with all of you. These take some time
but are well worth the LOVE & EFFORT!!
Hope you all Enjoy!!!!
*** If you would like to try a similar recipe but
less time consuming try my Samoa Bars click here.
RECIPE
(shortbread cookie dough) or you could buy
3 dozen shortbread cookies from the store to
save time & not make the base of the cookie
from scratch...
1 c. butter, soft
1/2 c. sugar
2 c. flour
1/4 tsp. baking powder
1/2 tsp. salt
1/2 tsp. vanilla extract
Do not use unless to dry (up to 2 Tbsp. milk)
I did not need to use any!
(Coconut/Caramel Topping)
3 c. shredded coconut
12oz. good-quality chewy caramels
1/4 tsp. salt
3 Tbsp. milk
(Chocolate drizzle/bottom)
8 oz. semisweet chocolate (chocolate chips are ok)
DIRECTIONS:
Pre-heat oven t0 350F. Bake for 11-13 min.
(keep watch..ovens vary..mine went 13)
1) In a large mixing bowl, cream together butter
& sugar. Mix in flour, baking powder & salt at a low
speed, followed by the vanilla. Milk is optional only
to make the dough stick together Add flour if your
dough is too sticky. The dough should come together
into a soft, not-to-sticky ball. SEE BELOW:
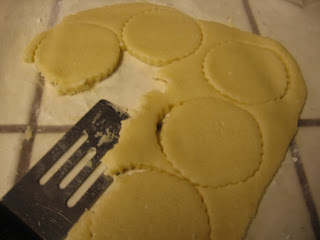
 2) Roll the dough (working in 2 or 3 batches) out
between 2 pieces of wax paper to about 1/4-inch
thickness & use a 1 1/2"cookie cutter to make rounds.
NOTE: you may have trouble taking the
excess dough around the cookie shape
because it is so soft..See picture below
where I use a small turner which worked
beautifully & save excess and roll out to
make more cookies. SEE BELOW:


 3) It was easier for me to flip the (turner with cookie)
on to my hand & then flip it over on to the cookie sheet
because the dough is so soft & buttery. SEE BELOW:
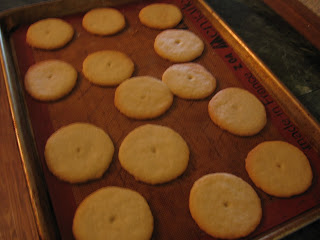
 TIP: I also used a straw to make the hole in the middle
of the cookie...However..if you look at the next picture
after they have cooked, the hole seems to have filled
up because the "spread" of the cookie as it baked.
SEE BELOW:
 4) So, I used a straw AFTERWARDS (When they
came out of the oven and were still warm & it
worked out great!) Set aside to cool completely.
SEE BELOW:
 TOPPING
Pre-heat oven to 300F.
1) Spread coconut evenly on a parchment-lined
baking sheet (preferably one with sides) & toast
20 minutes, stirring every 5 minutes, until coconut
is golden brown. Cool on baking sheet...set aside.
2) Unwrap the caramels & place in a lg. micro-safe bowl
with milk & salt. Cook on high for 3-4 minutes, stopping
to stir a few times to help caramel melt. SEE BELOW:
 3) When Smooth & creamy fold in toasted coconut
with a spatula. SEE BELOW:

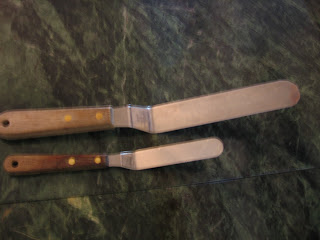
BEST Kitchen Tool for Spreading anything I think.
SEE BELOW:
SEE BELOW:
cookies, using about 2-3 tsp. per cookie. Reheat
caramel for a few seconds in the microwave
if it gets too firm to work with(it did for
me many times)SEE BELOW:
bowl. Heat on high in the microwave in 45 sec.
intervals, stirring thoroughly to prevent scorching.
Dip the base of each cookie into the chocolate &
place on a clean piece of parchment paper or
(I used) wax paper & spread the chocolate on
each bottom with an offset spatula (that was a lot
easier & to speed up the cooling process of the
chocolate, I put in the freezer til set. SEE BELOW:
Subscribe to:
Posts (Atom)


