I Love these Pillows..
 Funny how an accident
can turn into a
blessing or possibly
"New Item"in a
Boutique Shoppe...That's what happened
here.
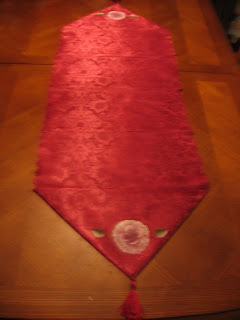
I was making
Table Runners into something
a bit more
"Vintage" by painting a rose on each
end of the runner..(they were for my
ChristmasBoutique....
Santa's Gift Shoppe) I have in my
home each yr.
I finished a number of them, put them away &
when I brought them out (for the boutique) I
realized one of them had
some paint on it in the
center which shouldn't have been there...because of that problem..I took the
runner..cut it, & made an
"Envelope Pillow"out of it.
When Life Hands you Lemons..Make Lemonade....isn't that how the saying goes???BELOW are
3 different colors with & without
embellishments (lace, ribbon, etc.) Which one do
you like the
BEST?????
This would make a Great Mother's Day Gift!!!(May 9th) They will be available in my "EtsyShoppe" in about a week....

 These are the supplies needed for creating
this Envelope Pillow...
1 Table Runner
1 pkg. stuffing (probably will use 1/2)
Needle/Thread/Scissors
 Directions:
 1) Lay runner out on table & cut off tassels (unless
you want them to remain on the pillow)
2) You would probably want to iron the creases
out of it at this point before starting to put it
together..SEE BELOW:
 3)
3) Paint a one-stroke rose w/leaves on each end
of runner (you can stop there & have a wonderful
Hand Painted One-Stroke Rose Table Runner)
.
**To Learn How to do One-Stroke Painting....
Donna Dewberry...The creator of it...has videos,
books, magazines..all of great help in teaching you
how to do it.
 (Painting on fabric is somewhat harder
 than on paper) Make sure it is thoroughly
dry before making the "Envelope Pillow"
 4) To make Pillow:
Cut runner in 1/2. Lay out on table & sew up
a 1/4" seam on the side (opposite from rose)
Turn the seam one more time to finish edge.
(Right hand side of the photo BELOW:)
 5)
5) Turn side that was just sewn ( The Bottom
of the pillow) & turn it up to where the triangle
of the top will fold down & over..like an envelope..
6) Sew both sides (one at a time) to make the
Envelope Pouch..Make sure you sew it ON THE
OUTSIDE OF THE PILLOW...SEE BELOW:
 7)
7) Flip the triangle over to create the finished
look of the Envelope Pillow.. Stuff pouch & pin
flap of envelope to pouch to make "Pillow".
Hand sew closed & embellish with ribbon, lace,
whatever you like. You can use Fabric Tack for
the embellishments or continue to hand sew
embellishments to secure. Spot Clean..

 Beautifully done..your finished.....

 WE HAVE A WINNER of the Mother's Day