Please FOLLOW US on Pinterest and LIKE us on Facebook

School Ideas..We have fun name decals, Backpack Name Tags, Teacher Gifts, Wall Vinyls..

Friday, September 14, 2012

Halloween Personalized Candy Buckets

Halloween is just around the corner & a number of my
customers are purchasing these bucket Vinyl Decals for
their kids Halloween buckets for their candy. It's cute, fun
& affordable.

You buy the bucket & tell us what name/font  &
color you would like & we will do the rest. You have
the fun of putting it together with your child. Transferring
Vinyl decals to any smooth surface takes only a few minutes.

Instructions included.

Available now in our Etsy Store..Here is the link to this item:
https://www.etsy.com/listing/90329744/personalized-vinyl-name-decal-plus-dots

Here is another link to a Boys Bucket:
https://www.etsy.com/listing/90329308/halloween-personalized-vinyl-name-decal

Have fun browsing.......

Wednesday, August 15, 2012

Homemade Ice Cream Drumsticks...Fast/Easy Dessert

It's 110 degrees in Central Calif. this week & I have a great way to cool off...with these Homemade Drumstick Ice Cream Cones. They are as good as store bought if not better (you can put more ice cream in the cone & nuts on top!) The Simple/Fast & Easy Recipe is below. Have Fun!!!
I found these on the Internet (cannot remember where though) I made these a few days ago with rave reviews from my husband & the family & my husband has been asking for them almost daily since. Here are the How to's:

***Ingredients needed:
Ice Cream Cones
Vanilla Ice Cream (we used reduced Vanilla Ice Cream & could not tell the difference)
Hot Fudge Magic Shell Ice Cream Topping
Planters Peanuts (lightly salted)

***Before you begin chop up peanuts, place in bowl...set aside.
Pour some Magic Shell into a small bowl to dip ice cream cone in... set aside.
Scoop ice cream in the cone making a rounded mound at the top.
Dip ice cream cone in Magic Shell & twist all around covering all the ice cream.
(at this point it will be a little drippy so I had a fan going close by & it helped it set enough to put the nuts on top (do not just dip cone into nuts) & place in the freezer for about 15 min.

***The hardest part was to find something that I could stand it up in the freezer with.
I came up with a plastic food container & put a plastic tall glass in it and put the cones around it for support.This was so they would not fall over before they were frozen.

***It worked out well & tasted delicious.A GREAT FAST DESSERT anytime...Try it! You'll love them!


Monday, August 6, 2012

New Items for BACK TO SCHOOL

It's that time of year again..BACK TO SCHOOL for the kids. So I thought I would show you
our NEWEST Back To School Items going into out ETSY store this week. ABOVE are Backpack ID's.Great for not mixing your kids backpack up with everyone else. You can put your cild's name on it or Initial & on the back it has the Name/Address/Phone/Email for any lost backpacks to get back to you.

                                          I.D. Insert included in Backpack Tag item.
Notebooks have changed a little since I went to school. They are a lot more colorful & fun now...Like this one with a Name & assorted vinyl dots.
I love these Pencil Boxes. They are so bright & practical.They can even be make-up boxes or filled with your kids favorite things. You can put your child's name on them with their favorite color of dots.
Hope you got some ideas for Back to school for your child. If you would like to visit our ETSY stoe HERE IS THE LINK: santasgiftshoppe

Have fun getting ready to Back To School.

Saturday, July 28, 2012

Back to School Teacher Gifts..New items at santasgiftshoppe Etsy store

Aren't these FUN??? These are a popular new Key Chain idea. This is a 3" Acrylic circle with Vinyl dots & names on them, plus bow... A  great item or teacher gift & extremely helpful when wanting to find your keys in a hurry.

They would make GREAT gifts for your child's new teacher this yr.  Start out the new year right.

You can have the teacher's name put on them or initial with polka dots..or even Tiger Stripes (Below)

These will be available on Fri. Aug. 3rd when we re-open from Summer vacation. See you then!

Here is the link:
http://www.etsy.com/shop/santasgiftshoppe


Monday, July 16, 2012

Updating your Kitchen Mixer with Damask Vinyl Decals


I love to make decals for these mixers..they are so much fun
and updates the kitchen so fast & easily.  Below are some fun ideas.

These are a preview of some new decals I'm doing when my Etsy store re-opens 
after Summer Vacation..Aug. 3rd. Hope you will come check them out...
along with a lot of other NEW items for your home, teachers, & Christmas Gifts.

There is a wide range of colors to choose from as well.


Monday, July 9, 2012

Edible Arrangements/Blog Hop

Doesn't this look delicious??? So refreshing!!! Especially when it's 104 degrees outside!

This is what you call an "Edible Arrangement." A wonderful idea that takes beautiful fruits & makes them into an arrangement like flowers but you eat & ENJOY.

My husband & I received one of these beauties from our daughters for our Wedding anniversary this yr. I have always admired them but did not know where to get them in our part of the country. I found out they are all over with a great variety of fruits & occasions to chose from.

My favorite part are the chocolate covered strawberries. I highly recommend these wonderful treats for all occasions.
I also love to create things like this so I am going to try my hand at making one of these for a dinner party we are having in a couple weeks. I will let you know how hard or easy it is & how it turned out. If looks reasonably good I will take a photo for you to hopefully see that you can make one of these too. We always hope you will be INSPIRED by the items we show on our blog....

BLOG HOP BELOW...


Saturday, June 23, 2012

Wedding Glasses Vinyl Decals (Lips/Mustache)

These are so much fun!!!!

They are Vinyl Decals you put on the Bride & Groom's Wedding Glasses. These are available now in my Etsy store. CLICK HERE for link to the store.

In the next couple of days I will be putting names & other color Lips & Mustaches for the Bridesmaids & Groomsmen.

These would make a great Wedding Shower Gift, Wedding Gift, even for a Romantic evening...or no reason at all. Just for fun..we all need a little more fun & smiles in life.

Let me know what you think.

Saturday, June 16, 2012

A Father's Day Tribute to my Dad

  HAPPY FATHER'S DAY...
I wish I could give my dad a big hug on Sunday!!
I love him so much & would love to pamper him
on Father's Day... but I can't...because he
 passed away many yrs ago.

****This is a TRIBUTE to him & all the other
Dads out there that make time for their kids,
make each child feel special & are that
"SPECIAL KIND OF DAD" like mine was.

I was so lucky to have such a wonderful
Father! (as well as a fantastic Mother) The
memories flood back of drive-in movies & playing
on the swing with Dad before it started. Taking
"just me" out to buy something special for no
reason. Making his weekly trip to Sears &
telling me to pick out my favorite peanuts/candy
from their Candy Counter or suggesting we get
some new shoes & "lets get Mom some high heels
too. " (Always thinking of how to surprise her with
something)...Always making me feel like I was his
favorite) Little did I know the other 4 kids felt the
same way!)

My Father taught me FAITH..& how to have it when
things look grim. He always was optimistic & showed
me what "Inner Strength" was & I could do anything
I put my mind to. He was so generous to his family &
everyone he met. I remember he would have me put
the flag out to the neighborhood kids to let them know
it was time they could all come over & swim in our
pool & play volleyball. (Which we did every night!)
And mom would have some kind of special treats
for everyone.


He taught by example & he and my Mom would
call Universities @ Thanksgiving and find exchange
students that didn't have a place to go & he would
pick them up to come & have it with us. I remember an
exchange student from Ethiopia, Africa...That was
really something! We met some very interesting
people to say the least & broadened our horizons.My Dad loved my Mom & (showed it all the time)
and that was a great gift to all of us 5 kids. We saw
examples of unselfishness & compassion on a
daily basis. I look at these photos & it says it all.
They even had a "Kissing Window" from the
kitchen into the family room so while she was
making dinner he would serenade her with his music.
He played tuba & string bass.

The Elementary school asked them, if they would
play Mr. & Mrs. Santa Claus and of course they
DID & LOVED IT!

The PHOTO Above is when they were
first married...

The Photo Below is 30 yrs later..The
same "LOOK" into each others eyes.
My Father & Mother truly found the....
JOY IN THE JOURNEY OF THEIR LIFE
TOGETHER & WITH THEIR FAMILY THEY
CREATED.


I am so blessed to have had the parents I did.

I LOVE YOU BOTH & MISS YOU SO MUCH!!
Happy Father's Day, Dad!
Have a wonderful Father's Day to all of your Father's.

Sunday, June 3, 2012

Amazing Father's Day Cakes

 Father's Day is coming..Sunday June 17th. I found a  blog (that actually found me) & I wanted to help him out..to show off the "world of Ties" & info he has regarding ties..

In other words "Everything you always wanted to know about Ties but were afraid to ask"...

 My mom used to do a Tie Cake for my father but not like these!! He had these Father's Day Cake Ideas on his Blog & they were incredible (but he did not make them) but gives you the link to the original creator of them.

I wish I had my Father here to give him a wonderful day but he passed away a lot of years ago at a young age. We miss him everyday but especially on Father's Day.
Happy Father's Day Dad....XOXO Love you.

HERE'S JUST A FEW FATHER'S DAY CAKES (That I LOVE) TO SHOW YOU WHAT I MEAN... So..Stop by his blog..Let's show him some support & Leave some comments... His name is Matt, his blog is HERE

tiecake7
 Original Source Here

tiecake11
  Original Source Here

tiecake3
 Original Source Here

tiecake9123
Original Source Here

Hope all your dad's have a wonderful Father's Day. Hope you got inspire!

Tuesday, May 29, 2012

Updating your Kitchenaid Mixer/Blog

 Updating Mixers can be a lot of fun! This one took me only about 10 min.
I cut some vinyl & dots & put them on & I love how it turned out.
Like it??? Need a Name & Dots to give your outdated mixer an updated
New Look?

Take a peek @ our Etsy Store where we specialize in Personalizing anything.
It is so much fun! Check us out @ http://www.etsy.com/shop/santasgiftshoppe

Blog Hop below photos...


Saturday, May 12, 2012

Happy Mother's Day


This is a tribute to my Mom...& all moms..
even though she is up in heaven with
my dad...I know she will know just how
much she is missed &  loved by her children
&  grand children.. especially on Mother's
Day..this Sunday!
Although she had a hard life growing up
(her own mother died when she was 1yr. old
& her dad died when she was 15) she made
a wonderful life for my dad & us 5 kids & I
will be eternally grateful for all the wisdom
she gave each one of us & example she
showed daily..
First & foremost she was the most charitable
person I ever knew..she always made room for
people who did not have a place to stay or food
to eat. She opened her home & her heart to
always helping someone or something.
Below is an old picture (sorry it's blurry) of her
helping a Rooster that my little sister brought
home from school (to give a good home to) My
mom was raised on a farm & she helped that little
rooster (until the neighbors complained of being
woke up@ 5am!) He eventually went to a zoo.

You could always find her in the kitchen
laughing & baking something for
somebody in need. She would bring in
dinners, babysit, take care of the elderly..
you name it..she did it.. But by the same
token...she was always there for
each one of us to make feel special
everyday. She had a special gift that way.
I think it was because as a child she only had 1 pair
of shoes & 1 dress made out of a flour sack material
&  her parents dying so young she wanted to give
us everything but most importantly..time & love.

She worked the graveyard shift at the hospital
just so she could have breakfast ready & lunches
made when we got up each morning...& be home
when we got home from school so she could help
us with our homework & have chocolate chip cookies
& milk waiting. I really wondered when she ever got
to sleep or eat..She loved cooking meals & serving
them to my dad & us kids &  she would get up 10
times for us before she ever got a bite of food.
(That reminds me of the "Christmas Story" Mom)

Anyway..I salute you mom & treasure all our talks,
& everything you taught me about being a good mom.
I cherish the memories of all our times baking together
& you being such a good example of Charity to others.

Your loving Daughter,
Barb

*****Hope all of you get to give your moms a kiss
& hug (I wish I could) & tell them how much they
mean to you..Life goes too fast & is too short to
not tell them what they mean to you...

Tuesday, April 24, 2012

BBO Chicken at its's BEST/Blog Hop

Looking for the Blog Hop??? It's below....

Looking for the best BBO Chicken???? Recipe is below...

I love.....this BBQ Chicken....and so does everybody
else who has tried it.....I'm told......it's really juicy &
delicious..... I really like to BBQ (when it's not hard
& it ends up tasting really good!) I tried a few different
ways of BBQ-ing chicken & this (for me) is the fastest
& easiest way to get Great Results.....

1) I get the chicken (a bag about 4lbs.)
@ Vons on sale price for about $8-$9.99 for
10-12 boneless/skinless breast pieces) The
number of the chicken breasts in the bag can
vary, but the taste is the BEST. Sometimes it
will be $5-$6..then I really stock up. The
flavor is the best tasting out of all the different
chicken breasts & tenders that I've tried.

2) TIP....I fry it on the stove first before I BBQ....
I do 1/2 of the bag at a time....Put a little canola
oil
in a HOT frying pan...(you'll use less oil that
way) spread it all around, then I sprinkle garlic
powder.....lite salt.... and pepper on both sides
of the chicken pieces.

TIP..(seer on both sides to keep the juices in....)
Let cook on med. heat til 3/4 done..

3) Put on plate and ....TIP....brush each piece
with a brush or two of oil (on each side) so the juices will
stay inside the chicken...(that was a Bobby Flay's TIP....)

4) Pre-Heat BBQ grill to around 350F-375F....(you
may want to do this before you start cooking the chicken
on the stove so it'll be ready to go when you are)

5) When the grill is ready....put chicken on.....
let cook for a minute or two (with cover of grill
down...to get that smokey flavor) and then flip
chicken over and cook on other side......then start
brushing a coat of BBQ sauce (I used Kraft Honey
BBQ sauce) on one side, grill for a few min. (always
shut the lid in between... to keep the smokey
flavor in the chicken) then the other.....

6) Then repeat (I did it 3 or 4 times) just for a min.
or 2 each time...til they have finished cooking.......
and look done......and enjoy!!!

Wednesday, April 18, 2012

Chicken/Cheese Broccoli Soup w/Bread Bowl & Blog Hop

Here is a FUN Recipe for you..Chicken/Cheese Broccoli Soup in a Bread Bowl

What's for dinner???
One of my New Year's resolutions was to use up
the food we have & make meals from the
ingredients I have on hand...
This is one of those recipes..I had a lot of
broccoli, & chicken to use up..So this is what
I came up with...Hope you like it...

So let's begin to make this phenomenal
"Chicken/Cheese/Broccoli Soup"...and
Bread Bowl (next time the bowl will be from
scratch...I promise & I'll give you the recipe)

I love the eye appeal this has when using the
Sourdough French Bread as a "Soup Bowl."
This recipe is from Liz K. as adapted by Sister's
Cafe...

I have changed the recipe to include chicken
(I always like to have more protein if possible)
& mixed Mexican cheese I had on hand...

RECIPE
1 can chicken broth (about 2 cups)
1 small onion, diced

1/3 c. flour
1/4 c. butter
Pepper to taste (I used about 1/2 tsp.)

2 c. milk
1 1/2 c. shredded cheddar cheese (sharper...better)
1/2 c. shredded Swiss cheese
1 c. Mixed Mexican cheeses
2-3 c. steamed broccoli florets (chopped in pieces)
3 chicken breasts (skinless/boneless/cooked) diced
1 Lg. Round Sourdough French Bread

Directions:
Simmer chicken broth & chopped onions for
15-20 min. in a covered saucepan, until onions
are soft. Heat milk in microwave for 1-2 min.

In a separate lg-size sauce pan, melt butter
& then add flour and pepper. See Photo Below..
Cook together for a couple of minutes until thickened..
Add warm milk until blended...Then add chicken
broth w/onions, cheeses, steamed broccoli, &
lg. pieces of diced chicken. Stir & heat together
on medium-high heat until soup starts to thicken..
As shown in next 3 photos...


Ouuu..it looks sooo good & smells even better!!!!
I wish you could SMELL IT!!

Now for the Bread Bowl
.....I had planned to make
them from scratch, but the afternoon flew by &
(I made Bread pudding instead..that will have to be
for another post) Wish you could smell that too!!!
Anyway I needed this done to take dinner into a dear
friend (& her family) who just came home from the
hospital..So I was fine with store bought...See Below:
Looking further below... shows how I cut the "Top"
off with an electric knife (It's easiest I think) & then
cut a circle around the loaf (leaving about 1/2"
of bread creating the "bowl". Then pull out (by hand)
the soft bread..
(You can use that to eat with the soup..Same with
the top..You can eat it with the soup or maybe with
some spinach dip like we did...)

It is out of this world
....Try it & let me know what
your family thinks...

It is so delicious & Comforting on a Cold, Gray
day outside...It's nice to be cozy & warm &
have a delicious nutritious meal that you
know will leave your family cozy & warm on
the inside, too.


Monday, April 2, 2012

Easter Bunny Lollipops/Blog Hop

EASTER is Coming!!!!

Easter also brings back so many fond memories
of new white or Black Patent Leather shoes, a little
matching purse, bow in our hair & oh yes...Let's
not forget that White hat with pink ribbon..we have
many photos my dad took to keep that very
memorable.

Does that sound like anybody elses childhood Easter
Sunday??? Going to church, Finding our Easter
Baskets, Ham Dinner with all the extras??? Sound
familiar??? Getting hungry for mom's cooking??

Our family still does all that but little girls/boys
do grow up all too fast..I have to admit I love for
my grown kids to come home to find Mr. Easter
Bunny has indeed come & left not as much candy
but maybe earrings, or book or some surprise in
Easter Baskets for them.

I love the family ties & gatherings...even if both
of my parents are gone..I still try to keep the
traditions alive & well.


SUPPLIES NEEDED:
For Basket
1 basket
1 piece of oasis foam
thin gauge florist type wire or tape
wire cutters
1 pkg. of iridescent grass
a couple (2 or 3) of colors of curling ribbon
scissors

For Chocolate/White Chocolate Lollipops
1 candy mold (I used bunnies, eggs, & tulip mold)
1 Bag of candy melts (a bag will usually do I think
around 25-35 maybe more depending on the size
of each mold)
1 bag of (50)lollipop sticks (Walmart or Michaels)
1bag of (50) lollipop bags (Walmart or Michaels)
aluminum foil
med. microwave-safe bowl
teaspoon to stir & put melted candy into molds
Oh..Another thing..I used what I had on hand.
This is how I did the Basket..

DIRECTIONS FOR BASKET:
1) Found basket I could use..Found some old
already used (but recyclable) Oasis Floral Foam.
Took some wire (thin gauge florist type..Walmart or
Michaels have) & made it so the wire secured the
foam, cut it with wire cutters & twisted until tight.
It's hard to see but that's what I did. You could
secure it tightly with florist tape (I didn't have any)
& wrap it through the holes of the basket.
SEE BELOW:

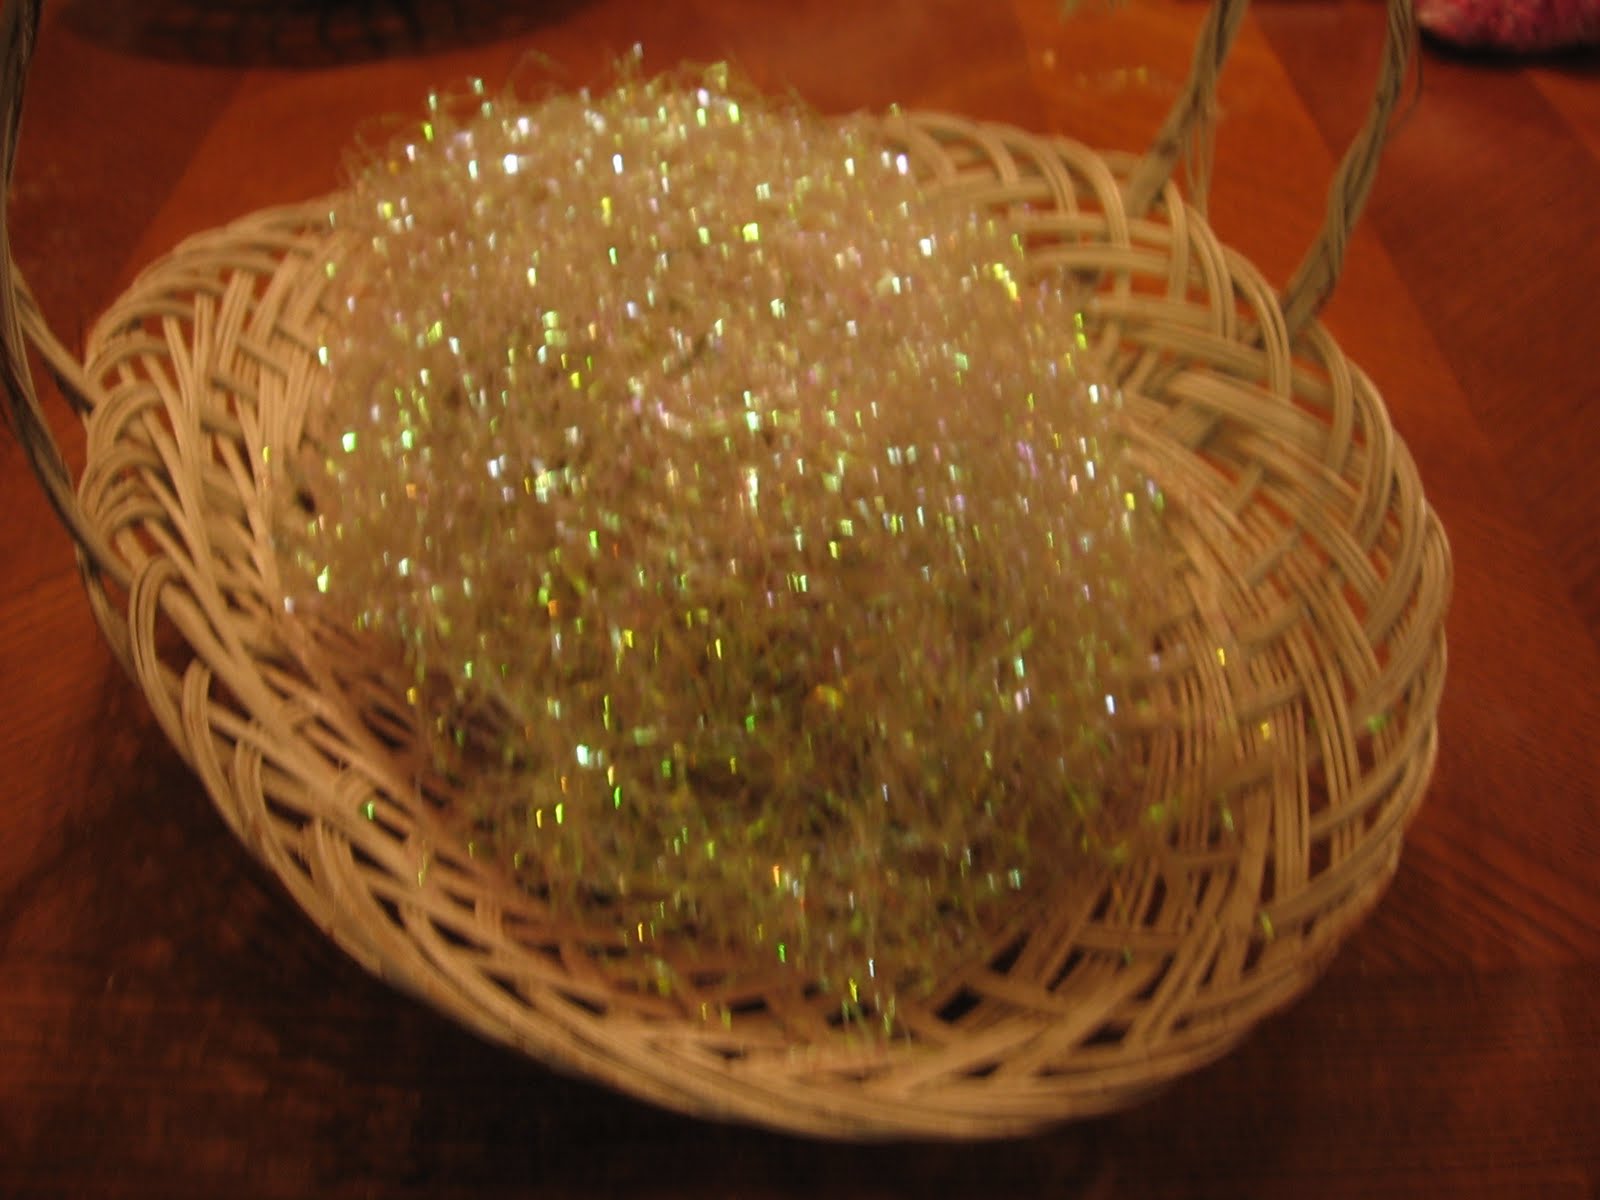
2) Arrange iridescent Easter grass on top & sides
of foam (I didn't even need to secure it. It worked
out just fine. The lollipops will keep it pretty much
in place. (I cut off old ribbon with wire cutters)
This is how I did the lollipops
.
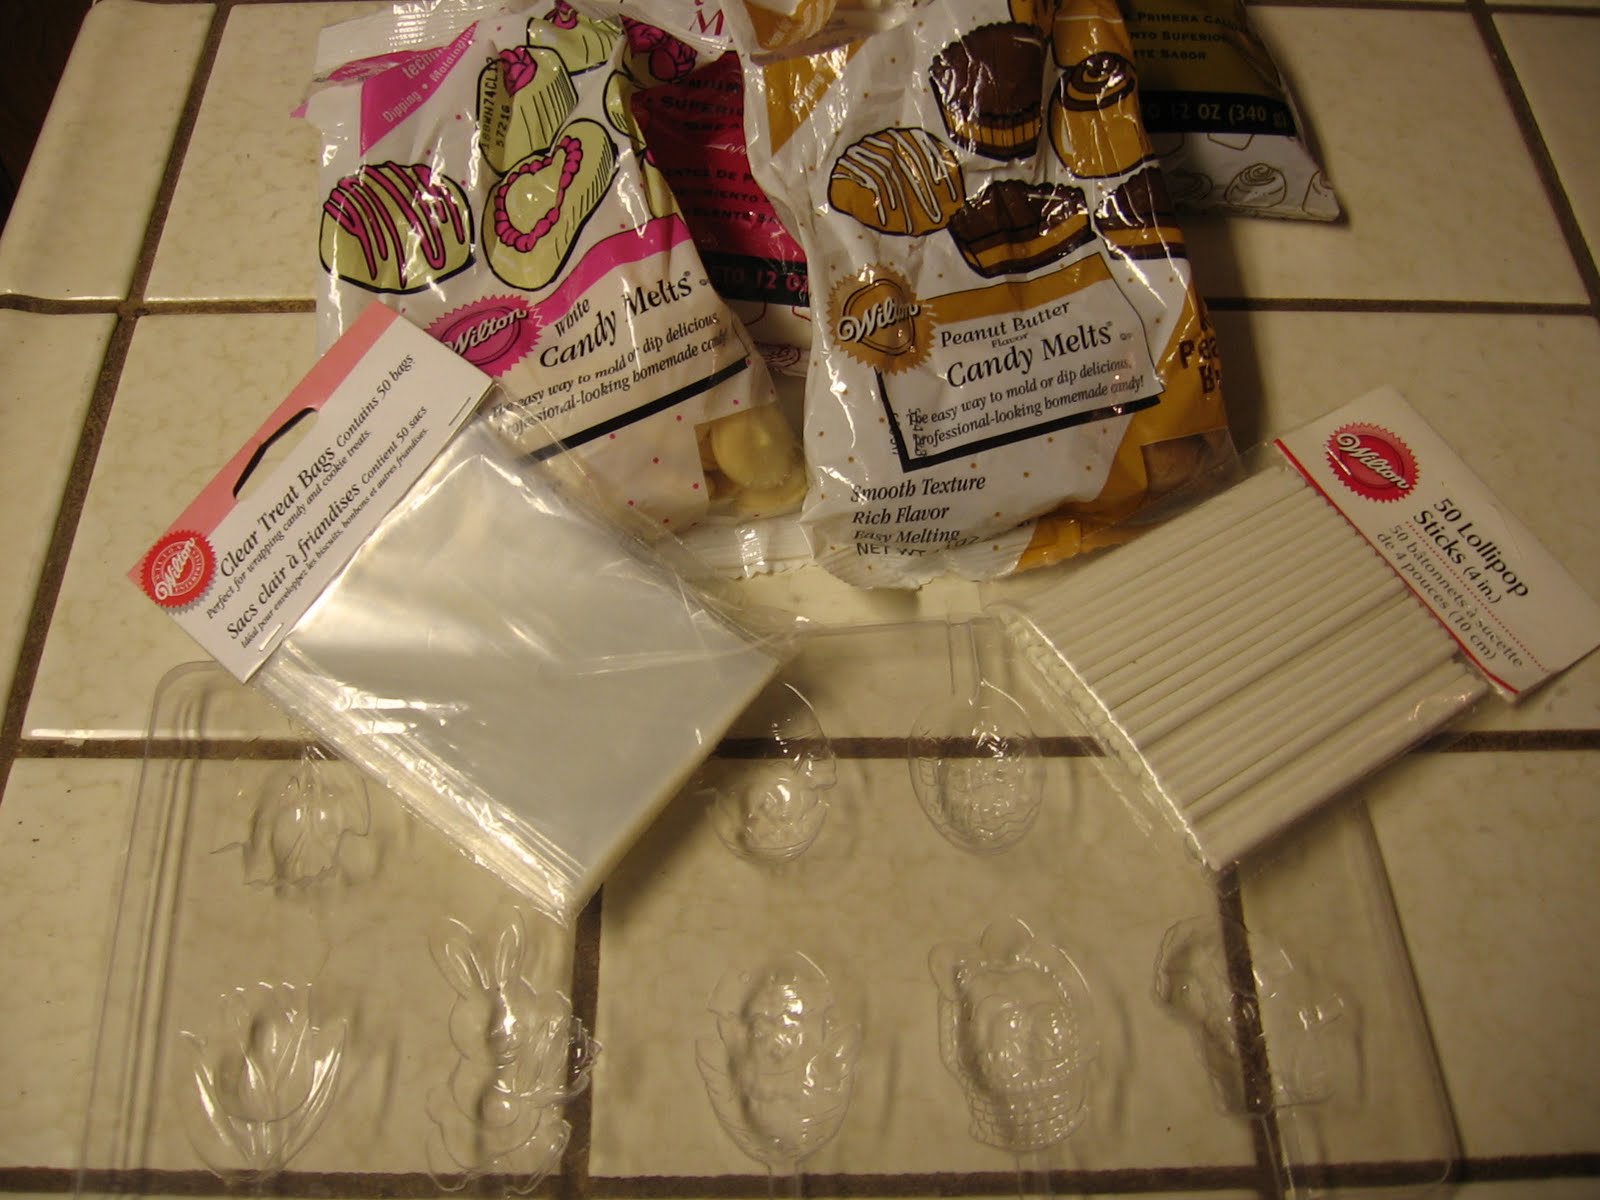
DIRECTIONS FOR LOLLIPOPS:
1) Gather supplies together..SEE BELOW:
2) Pour 1/2 bag of candy melts into microwave-
safe bowl. Microwave on full power for 45 sec.
(My microwave is 1100 watts & this works fine
for me..you may have to fine tune your own time
& your wattage maybe different than mine..just
keep checking it & stirring it & it should be fine)
Keep stirring & checking very 15-20sec. (if it's on
high) until melted. You might feel safer having it
on 50% power & checking every 30sec. or so. Do
the same with rest of candy melts (depending on
how many you need)
SEE BELOW:
3) Take a clean candy mold & with a teaspoon
fill each bunny, tulip, (whatever) with chocolate
or white chocolate (not overflowing)
4) Lay lollipop stick (inside slot provided in mold
going into the melted candy) & twist til stick is
covered with melted chocolate. You would be wise
to add a dollop of chocolate on top of that place where
you twisted the stick to make sure it is secure &
it will stay in much better. After it cools & hardens..
it will be very secure.SEE BELOW:
5) Place in refrigerator or freezer for a short time
(try 10-15 min.) & keep checking them until they
"harden." Then take out of freezer or refrigerator
(I like the freezer best because it's way faster)
& turn them over & "pop" them out on to a piece
of foil. Believe it or not they do not need anything
like Pam or spray or anything to help them pop out.
I have used these again & again & have never had
any problem with them not popping out of their
molds.The detail is amazingly clear on them.
SEE BELOW:
6) I like to put mine in one of the lollipop bags
(they are the perfect size) & tie some curling ribbon
around the stick to secure bag in place.
SEE BELOW:
7) Curl ribbon with scissors edge & your thumb.
(Careful not to hurt yourself)SEE BELOW:
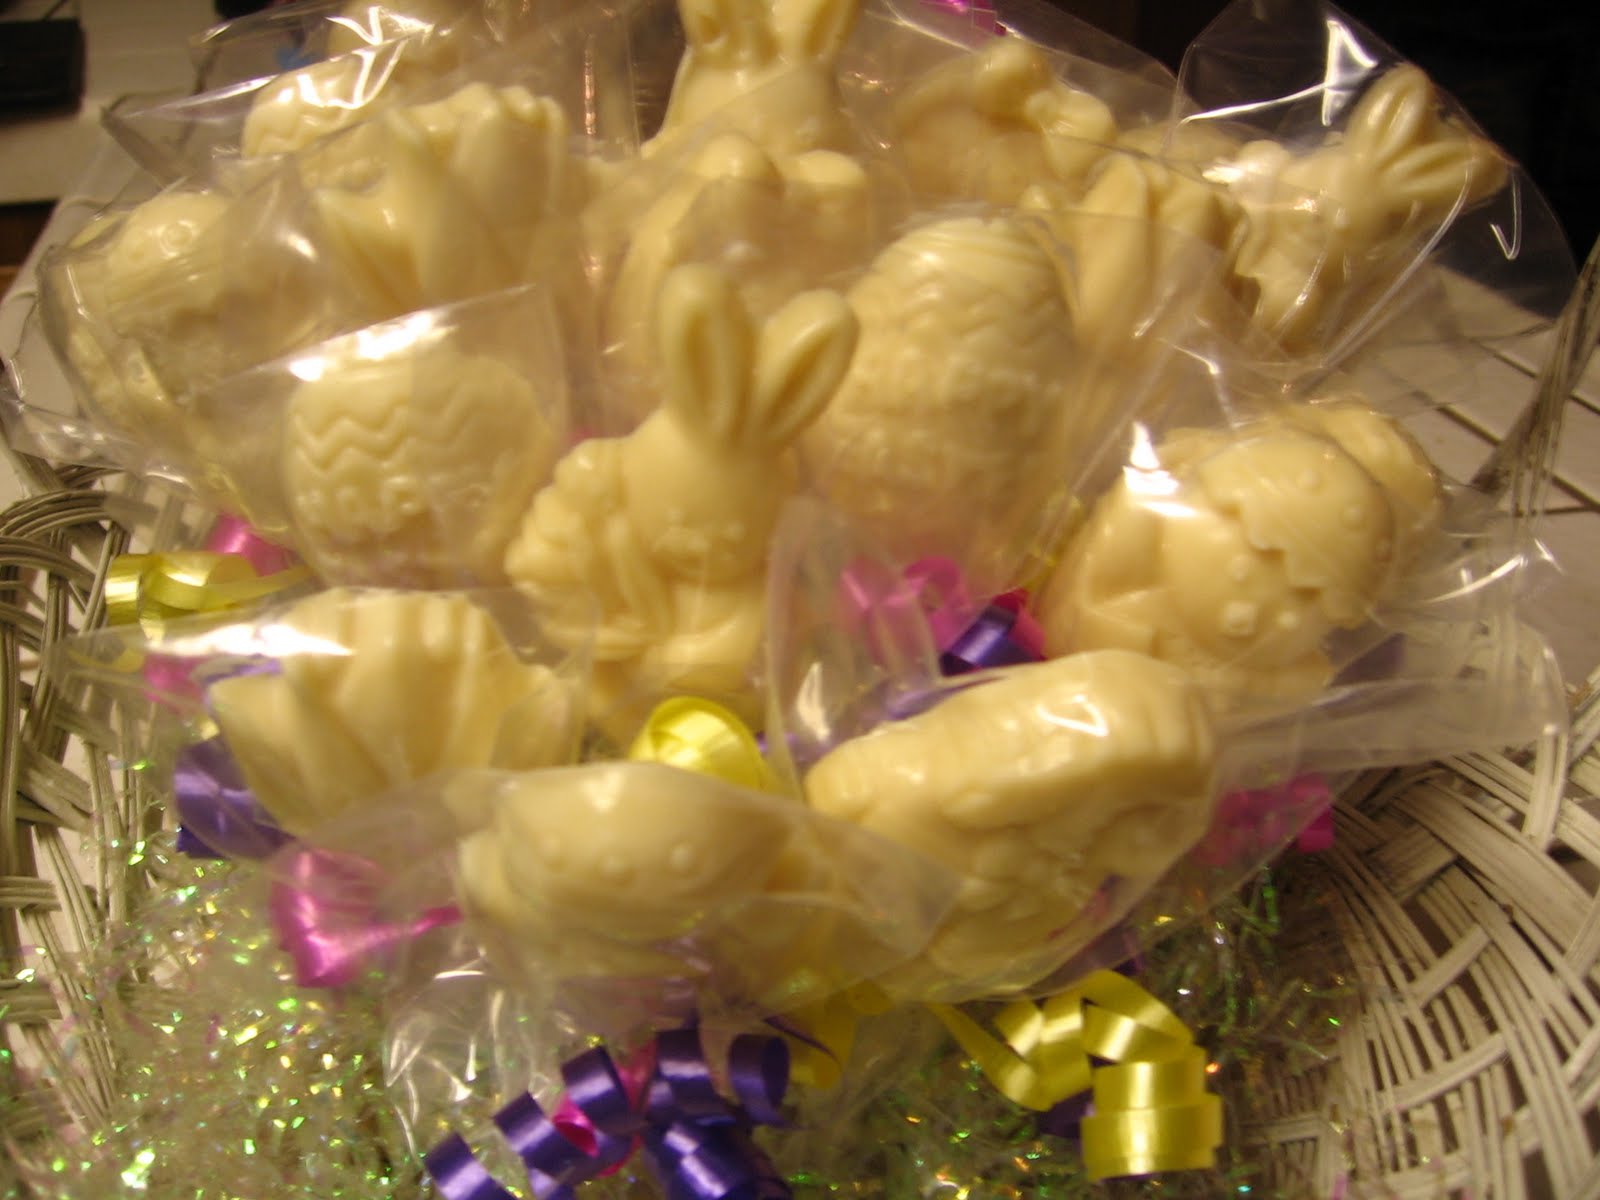
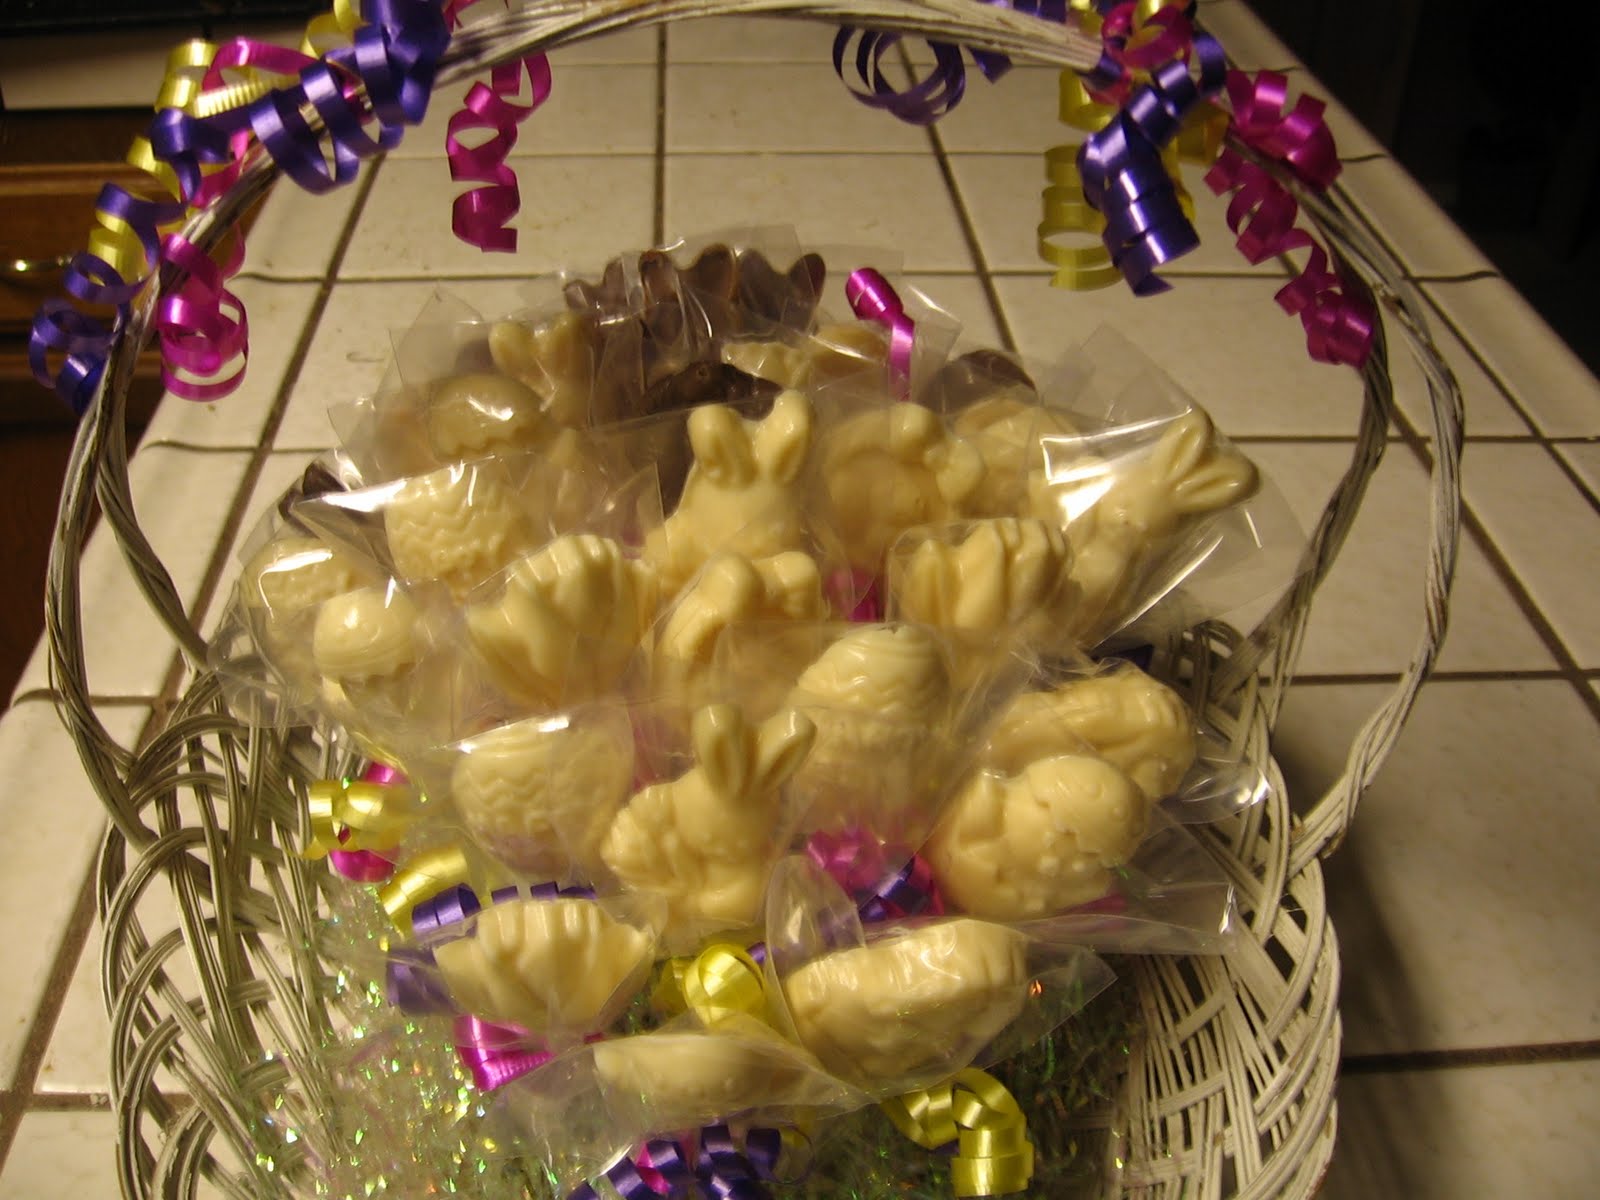
8) Stick each one in the oasis in the basket &
look at them...They look like a little bunch of
bunnies in an egg field or bunny & egg patch..
SEE BELOW:
AREN'T THEY CUTE????? Have fun & let me
know how they turned out for you...Enjoy..