Saturday, September 26, 2009

Easy/Fast Cherry Cobbler "a la mode"

Doesn't this look yummy?????? It tastes
even better & it's the easiest, fastest dessert
to do. We went to a dinner party at some
friends house tonite and this is what I brought.

They had us make individual pizzas, with a
huge assortment of toppings and our
great host/chef barbecued them in his wonderful
outdoor Bar-B-Q pit/grill restaurant type patio
(which he built himself I might add)
He & his wife are amazing and their food
absolutely delicious. That was probably the
BEST pizza I've ever had.....Wow!

Anyway sorry about digressing....This Cherry
Cobbler topped with vanilla bean ice cream
(and it could be apple or just about any
type of fruit probably) recipe came from a
dear friends mother.
It only has 3 ingredients to boot.....


Recipe

1 reg. size can Comstock pie filling (cherry
or apple)
1/2 box of white or yellow cake mix
1/2 c. butter (1 cube) melted


In a 8"x8" square pan (that has been buttered or
sprayed with Pam) pour the can of pie filling into
it.

Sprinkle 1/2 the box of cake mix evenly over the
pie filling.

Pour approx. 1/2 c. (1 whole cube) of melted
butter as evenly as possible over the cake
mix (I used a Tblsp to make it easier)

Bake @ 350F. for 25min.
This is how it looked after coming out of the oven.
Add the "a la mode" ice cream and that's it......

NOTE: (I made some changes for this recipe)
**********I used a 11 x 7 1/2" glass pan because I
knew I needed more servings than an 8x8 would
yield.
**********I used a large can (30 oz.) of Pie filling
and all of the cake mix (I didn't want any left
over)
**********I used the same amount of melted
butter as the recipe

***ALERT....FREE GIVEAWAY COMING****
*****************SOON*********************
**Check back often so you don't miss out!!!!

Wednesday, September 23, 2009

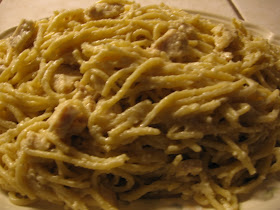
Easy/Favorite "Chicken Tetricini" Recipe

As promised a few days ago (I made this for a new
mom & dad in our church) I told you I would give
you this great recipe for "Chicken Tetricini."
So here it is....

I got this a number of years ago from my wonderful
friend, Ingrid. I have a number of her recipes and all
I have tried have been fantastic. Needless to say she
is a great cook....and doesn't she have a beautiful name...

Anyway I thought you should have a chance to try this
easy & great tasting main dish. It's truly one that
I make at least once a month. We eat a lot of boneless,
skinless, chicken and this is a delicious recipe to use it in.

Recipe

1/4 c. margarine (I used 1 cube= 1/2 c.)
1/4 c. flour (maybe add more as needed to thicken)
1/2 tsp.salt
1/2 tsp. pepper
1 c. Chicken broth (I used 1 14oz. can=2c.) = extra sauce
1 c. Whipping cream (also increased this to 2 cups)
3/4 c. Real Grated Parmesan Cheese
1 pkg. Spaghetti (16oz.) I increased this to 24oz.
2 cans chicken or 2 (cubed) chicken breasts

Boil water. Add spaghetti. In another bowl, (I used a
sauce pot) melt margarine over low heat Add flour to
make a paste. Mix in salt & pepper, & chicken
broth. Add whipping cream. Stir.

Add chopped chicken. When spaghetti is ready, drain
& put in serving bowl. Add sauce & stir until combined.
Sprinkle fresh grated Parmesan cheese on top & stir.

****optional: add some fresh (finely chopped)
parsley or dried parsley flakes.

*******GIVEAWAY ALERT........COMING SOON
Keep checking back... Can't wait to give something
away!!!

Sunday, September 20, 2009

Another "Sneak Peek" of Santa's Gift Shoppe (STACKERS w/Vinyl Lettering)

Here is another "Sneak Peek" at some of the
items you'll see at this years "Santa's Gift Shoppe
Boutique" (Fri. Dec. 4th 10-7pm & Sat. Dec. 5th
10-4pm)

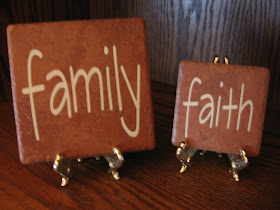
The above item is called a "STACKER" (you
can put whatever phrase or words of vinyl
lettering that will fit on it)

This particular one is painted "Italian Sage" and
was a gift for a darling young couple in my church who
just had their first child (a baby boy a few weeks ago)
I took dinner into them last night (Chicken Tetricini)
I'll give you guys the recipe in one of the next
posts...it's delicious...(got it from a wonderful friend)
and got to see him... he is sooo cute....and he sleeps a
lot, too...his mom said

These "STACKERS" are a GREAT way to put
important stats and memorable moments
on home decor items for all to share in....
sharing some Family History, if you will....
(another love of mine)

These "STACKERS" are more in keeping with the
Holiday Season & have cute sayings that are
"whimsical"...but isn't that just like the
holiday season..a bit magical...wondrous...

This "STACKER" (above) is one of my Favorites....
I love the sentiment as well as envisioning the
sacred event.....Also the ribbon is a really pretty
silver & complements the black...

This "STACKER" (above) is very contemporary...
I really like the saying on this one a lot as well... The
color on the wood is "Butter Pecan" w/ Black
Satin Ribbon..It could go pretty much anywhere
in your home...or if you wanted to give it as a gift....
Last of all....This is another take on the "Holiday
Season"...It's just the colors are reversed red/
green/red but you could put any "Christmas"/
Holiday Greeting etc. sayings on these...they
are very versatile....
***************GIVEAWAY ALERT*************
*********KEEP CHECKING BACK WITH US....
SOON WE WILL BE HAVING OUR 1st
GIVE AWAY .......A chance to receive a NICE
GIFT FOR YOURSELF (or to give to someone else)

Monday, September 14, 2009

HOMEMADE ALMOND JOY BARS

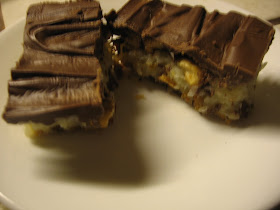
Wow.....These are great!...These taste like
the wonderful Almond Joy Bars we had when
we were kids....They still have those....They were
my mother's favorite.....

The roasted almonds are out of this world mixed
with the sweet coconut, chocolate, and graham cracker
crust...Wow...It's a great dessert. The recipe
comes from Better Homes & Gardens magazine...

******I did a couple of things that you should not do.
I used a smaller size pan (7x11x2) because that's all
I had available....I found that it made the top layer
of chocolate so thick I had a harder time cutting them.


RECIPE
2 c. graham crackers
1 1/2 c. whole almonds
1/3 c. brown sugar
2/3 c. butter, melted
1 14oz. pkg. flaked coconut
1 14oz. can sweetened condensed milk
18 oz. dark chocolate pieces, melted


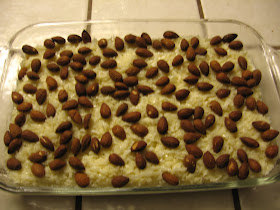
The photo above shows the whole almonds before
they go into the oven to roast...
*********To roast nuts spread them in a
single layer in a shallow pan. Bake in a
pre-heated 350F. oven for 5-10 min. or
until nuts are slightly golden brown, stirring
once or twice.

Directions:
1. Preheat oven to 350F. Place graham crackers
crumbs, 1/2 c. of the almonds, & brown
sugar in a food processor or blender. Cover
& process until almonds are finely chopped.
Add butter, cover & pulse 4 or 5 times or
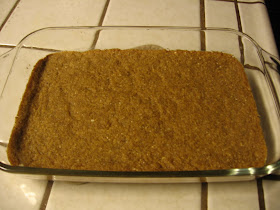
until mixture is well combined. Press crumb
mixture into bottom of an ungreased 13x9x2 inch
baking pan. Bake in preheated oven for 12 min.
Cool on wire rack.


2. Combined coconut and sweetened condensed
milk in a medium bowl. Spread mixture evenly
over crusted crust. Sprinkle remaining almonds
evenly over coconut layer. Bake 10 min.

****To melt chocolate pieces, place into a
micro-safe bowl. Microwave @ 50% power
(medium) about 3 min. or until chocolate
is melted & smooth stirring once or twice...

3. Spread melted chocolate evenly over top of baked
mixture . Cool completely in pan on wire rack or chill
in refrigerator until the chocolate is set. Cut into bars.
Enjoy.........

To store: Place bars in a single layer (in an airtight
container); cover. Refrigerate up to 1 week or freeze
for up to 3 months. Let stand 30 min. before serving.

Thursday, September 10, 2009

"Sneak Peek" of the Vinyl Lettering on Italian Stones for the Christmas Boutique

I wanted to give you a "sneak peek" into some
of the projects we are working on for the "Santa's
Gift Shoppe Christmas Boutique" this year......

Fri. Dec. 4th 10am-7pm,
Sat. Dec. 5th 10am-4pm

If you would like to come...just email me @
Santasgiftshoppe1@hotmail.com & leave
your email address, or regular mailing address
if you do not use email & I will get back to you
asap.

These make absolutely the best Christmas,
Birthdays, Anniversaries, House-Warming,
Wedding, (YOU name it kind of gift) there is.
All different price ranges, & sizes...... Something
for everybody........
........an added bonus I found out last year (when
customers let me know)....you could SEND them in
the FLAT RATE boxes from the Post Office)
just wrap them well in bubble-wrap & into the
FLAT RATE BOX....&....OFF THEY GO.......
No matter how heavy they are...I had one
lady send a few at a time to her daughters...
Great Idea!!!
These have only been a small sample...There are
many other sayings, colors of Italian Stones,
etc. to see....Hope you can come and see
for yourself. P.S. One of these stones will be
1 of 6 Free GIVEAWAY GIFTS @ the Boutique...

Monday, September 7, 2009

Double Chocolate Banana Bread


If you are anything like me, you find you have a lot
of bananas that never seem to get eaten up fast
enough before they get a little TOO RIPE. That's
where having a selection of recipes that need
bananas comes in handy...& maybe your tired of the
same old banana recipes (however I have one that
is fabulous & hope to share it with you closer to the
holidays)

Helpful Tip: You can put any over ripe bananas
in your freezer and use them when you are ready)
Make sure you peel them before you freeze
them..Then when you are ready to use them...
put them in the microwave for about 30-45 sec.
(depending on how many you have to defrost)
and mash them up....Really easy....


This one my daughter sent me, that she found on the
Internet....There are quite a few out there.....
The original comes from a magazine called Cooking
Pleasures....& this on is from the Sister's Cafe...
She told me she thought they tasted like the Big
Beautiful Chocolate Muffins from Costco....
She loved them....

If you like chocolate, with the taste of banana
bread, and some chocolaty chips thrown in
for good measure..then I think you might like these.

The Recipe says it makes 1 lg. loaf...but I prefer
to make 8 smaller loaves ( so I can give them to
friends & neighbors) It would be a great after-school
treat (for the kids) along with some milk as well.....

In making 8 smaller loaves I get to use one of my
"Favorite Kitchen Items"......My "8 small
loaves at once pan"......I think it was a Martha
Stewart pan that I found at Kmart.....
(SEE PHOTO BELOW)

I use this pan a lot....Especially with all the
Holiday Baking which I do for the "Santa's
Gift Shoppe Boutique," as well as my own
family holiday baking....(which I do a lot of)

Recipe
1 c. sugar
2 eggs
1/3 c. vegetable oil
1 1/4 c. mashed bananas
1 tsp. vanilla
1 1/2 c. flour
1/2 c. cocoa powder
1 tsp. baking soda
1/2 tsp. salt
1 c. semi-sweet chocolate chips

Heat the oven to 350F. Spray loaf (8x4) or loaves pan
with cooking spray.

Beat sugar, eggs, & oil in large bowl at medium speed
until combined. Beat in banana & vanilla at low speed.

Combine flour, cocoa powder, baking soda, salt in a
medium bowl; beat into banana mixture at low speed
just until combined. Stir in chocolate chips.

Spoon batter into pan. For 1 loaf bake approx. 60-70
min. or until a toothpick inserted in the center comes
out clean. Cool 10 min. Remove from pan; Cool
completely on a wire rack.

******If you are using an 8 loaf pan (like

I was) then only have the bread in the oven

approx. 15-20 minutes (each oven is

different) so keep watch on them so they

don't burn....& check them with a toothpick.

Wednesday, September 2, 2009

Easy Tips for transitioning Spring/Summer into Fall

Here we are...already into Sept/Back to School!!...
It's still pretty warm here (90's) but I absolutely LOVE
the starting of the coming season....The crisp Fall....
mornings and beautiful colors that come with
Fall, and then the HOLIDAY Season.....
Thanksgiving, Christmas , & the New
Year.........and of course our Santa's Gift Shoppe
HOME Boutique....

Mark your calendars for:
Fri. Dec. 3rd (10am - 7pm) &
Sat. Dec. 4th (10am - 4pm)

I know some of you don't like the Holidays because
of so much more work you have to do & the pressure,
but maybe I can offer some Helpful Tips that make
changing the decor in/out of your home a little less
challenging & time consuming to do.

The Top Photo of the Spring Wreath just shows
you a way (that I use) to try & make the Spring/
Summer into Fall
transition easier for me to do......
and about 1/2 hr. to do the whole porch.....

I love these...They are some of my Favorite Storage
Containers....You should be able to get them @
Walmart, Target, Michael's during the Holiday
Season or the "After Holiday Sales".....They
are worth it...


*******I use a wreath container to hold my
Fall wreath in the Spring & Spring..........
and my Spring/Summer wreath in the Fall.
It also saves on the wear & tear of the wreath
itself.....So in a very little amount of time I
switch the wreaths on the porch.....&.....viola....
"It's starting to look like Fall on the porch"
This Photo shows I do the same thing with
Table Runners/Cloths.....Have a special place
for them in the linen closet or wherever.... so you
won't have to run around trying to remember where
you put them last year......if they are in the same spot
all the time........ That's one of the benefits of
organizing... It Saves Time....& I love that.....


This Photo.....shows the "Before" or....
our Spring and Summer porch.....

Then with just a few changes of Fall flowers
into the planters and changing the wreaths
you have a "Welcoming for Fall" as well as a
warm & friendly welcoming to your friends..
As in the Photo Below....."The After"


This Photo shows the Fall flowers/colors that
were used in each planter....

This Photo is a Close-up of the coordinating
(matching) Fall flowers/colors used in the
wreath as well....
This Photo shows how easy it is to find
the Fall flowers.......to change with the
Spring flowers...when stored in a plastic
tub that has Spring Flowers written on one
side and Fall Flowers on the other (see
bottom Photo)

So....they are easy to "see" what's in them....
because of the "clear"plastic .....and they
keep the bugs out too!!!!!!!!!!These are one
of my Favorite Storage Containers...
I hope these "ideas and suggestions" have
helped you in some way......even to start storing
things in plastic/see through tubs to help
organize your garage or storage area.... Let
me know what you think......