Please FOLLOW US on Pinterest and LIKE us on Facebook

School Ideas..We have fun name decals, Backpack Name Tags, Teacher Gifts, Wall Vinyls..

Sunday, January 3, 2010

How to make Aebleskivers (Danish Pancakes)

Well the title of this post is:
How to make Aebleskivers....It's even
hard to pronouce but I hope to
show you how through this tutorial.

THE TOP PHOTO SHOWS YOU THE END
RESULT (or what we hope they will look like)
with a selection of my homemade jams: Straw-
berry/Boysenberry, Strawberry/Raspberry/
Blueberry, & Strawberry/Blackberry..Ymmm!!

This is a family tradition I remember my
mother making these a lot..not just at Christmas..
but all the time!! She was Norwegian (& was
raised by her Norwegian grandmother who
did not speask any English)

One of her favorite places was Solvang (a Danish
Community by Santa Barbara/Buellton area..
Calif.) where she got her pan (as well as I did)

According to Wikipedia, Aebleskiver
(Danish meaning apple slices, are traditional
Danish pancakes in a distinctive shape of a
sphere) They have been described as a cross
between a pancake & a popover... They are light
& fluffy & delicious with jams & confectioners
sugar or syrup & butter...

RECIPE

Mix together:
1 1/2 C. Flour
1/2 tsp. Baking Soda
1 Tbsp. Baking Powder
1/4 tsp. Salt

Beat together with a whisk or fork:
1 C. Buttermilk
2 Eggs
1 C. Sour Cream

Below: are some of the dry ingredients (I only
had dry Buttermilk which when mixed with water
is the same as regular buttermilk) I hope that doesn't
confuse you...I should not have had the buttermilk
in the picture or sour cream.


Below: These are the dry ingredients: Flour, Baking Soda,
Baking Powder & Salt in a bowl.

Below: These are the wet ingredients: Buttermilk,
Eggs, & Sour Cream

Below: This is how it looks mixed together (dry
& wet ingredients)

Below: This is the original Aebleskiver Pan..
You can get the original in Solvang or probably
online...Now I see similar ones everywhere..but
I don't know if they heat the same or are as
heavy & sturdy as this one is..It should last a
lifetime.


To Make: Combine the dry & wet ingredients
until smooth..put 1/2-1 tsp. oil in each space in
the aebleskiver pan. (I tried several different
ways: Non-stick spray burnt them, not enough
oil made the outside mushy, butter would probably
burn) The Canola Oil worked well..
Heat the pan until Hot...You should hear
the oil sizzle...before adding the batter.
Below shows you how they bubble like
regular pancakes (when they are ready to be
turned)

This is the tricky part..The Solvang people
say to turn them in 1/4 turns..Which I have tried
to show you here in the following 4 photos.

You can turn them completely over the first
time but it will be a flatter sphere & not as
fluffly inside..It should be round all the way around.

My mother turned them with a knitting needle..I
found a wooden skewer grabbed it the best.
I have seened people use a fork to turn them as well.


Below: This shows you how they should
look when done...Crisp on the outside &
soft/fluffy on the inside...

After you put them on your serving plate sprinkle
Powdered Sugar on top (either with a special
can for sprinkling or take a sifter..here is a smaller
sifter size for rolls & such)

and now dip them into your favorite jam or
melted butter & syrup....is your mouth
watering yet???
AND ENJOY!!!!

Thursday, December 24, 2009

Christmas Morning Casserole

MERRY CHRISTMAS!!!!!!!! Hope you are
having a wonderful time with family & friends.

Christmas morning is always special & so I
thought I'd give you a Christmas Breakfast
casserole you can make the night before.

Recipe

1 (12oz.) pkg. sausage
3 cartons fat-free egg product or 6 eggs
1/2 sour cream
1 1/2 tsp. dry mustard
1 tsp. minced onion
3 cups cubed french bread
4 oz. (1 cup) shredded sharp cheddar or mixed cheese
paprika (optional) just sprinkle on top

Directions
1) Spray 13"x 9" pan with Pam. Cook sausage til pink is
gone & drain well..set aside.

2) In large bowl combine egg product, sour cream, dry
mustard & onion; blend well. Stir in bread cubes, cheese,
& sausage. Pour into sprayed dish; sprinkle w/ paprika.
Cover with plastic wrap. Refrigerate at least 4 hrs. or
overnight.

3) Heat oven to 350 degrees F. Uncover dish; bake 40-50
minutes or until center is slightly puffed & knife inserted
comes out clean.

The above photo shows it after it has come out
of the oven & cut....It needed something...so you
can keep it as is with the recipe above or you
can do what I tried...

The photo below shows what I added...hash browns
on top with some shredded mixed (4 Mexican) cheeses

I think it tasted better....Your choice...Have a great
Christmas Breakfast & rest of the day!!!

Merry Christmas & Happy New Year to all
of you.... Thank You for your continuing support

of this blog & Santa's Gift Shoppe & Ideas.....
I hope we have helped you with some recipes/or
ideas with your celebrations during this past year!!!
We hope to bring you many more in 2010!!!

Plus more GIVEAWAYS!!!!!

Thursday, December 17, 2009

Chocolate Trifle Dessert Plus More Ideas for your Home

Here it is...One of the easiest elegant desserts
I know how to make! You can too!

Impress your guests with this "Chocolate Trifle
Dessert" We had it at our annual Christmas Party
& people were coming back for 2nds & 3rds...Yahoo!!...
I love it when people are eating, laughing, having a
great time...making wonderful memories...
(it was our 20th yr.) We have the best friends!!!
We feel so blessed....

It looks the best in a Trifle Bowl such as this
because you can see the layers better. You can get
the bowl @ Target, Walmart (places like that)

It's a really easy/fast recipe...so I wanted to
share it with all of you...Merry Christmas!

Recipe
1 pkg. Brownie mix
1 6oz. pkg. Chocolate Instant Pudding (Sugar Free)
(it's what I had on hand)
1 6oz. pkg. Vanilla Instant Pudding (Sugar Free)
(again it's what I had on hand)
3 Baby Ruth candy bars (sliced)
3 Heath candy bars (broken in pieces)
1 12oz. Cool Whip & 1 8oz. Cool Whip (or 2 8oz.)

Make brownies according to pkg. direction (set aside)

Make Chocolate Instant Pudding according to pkg.
(pour 1/2 into bottom of Trifle bowl to make
bottom layer)

Break up (in your hands) cooled brownies & put
1/2 on top of Chocolate pudding

Top that with 10oz. of Cool Whip
Put the rest of the Chocolate Pudding on top
of Cool Whip layer

Put (crushed or broken pieces of Heath bar) for
next layer (It won't cover all...that's OK)

Make Vanilla Instant Pudding (according to
pkg.) & put all of it in bowl as the next layer

Next...put (sliced) Baby Ruth Candy bars as the
next layer...Put the rest of the crumbled brownies
on top of that.....

Finish with the rest of the Cool Whip & put a
Christmas Flower on top & refrigerate for 3hrs.

ENJOY!!!!!!!!
In the photo below is the easiest way to dress
up kitchen stools for the holidays....Just measure
across the top of the stool add a few inches to the
circle (or you could cut a square) & tie with ribbons!

This is our heart cross-stitch hutch..
I love it...I found a Red Kettle a long
time ago & love to pair it w/the
Red Christmas Swan...

This is a toy soldier (out of wood) I
made for Santa's Gift Shoppe Boutique
last year....Also below "And the
Stockings were hung" w/4 stockings
was @ Santa's Gift Shoppe, too last year!
And last.....is an idea on giving an
EASY/CUTE Gift Box along with
the gift inside!!!
These were what we gave to our Party
Guests last Friday...I love to dress
gifts up with a BIG Ribbon & BOW...
I got these cute gift boxes @ Oriental
Trading Co.....Santa's & Snowmen!!!!
Their so cute all together....I did a close up
so you could see the great detail in the faces...
Well....Hope you got some NEW IDEAS that
will brighten up your Christmas Holidays!!!!

Monday, December 14, 2009

Christmas Ideas For Your Home

Merry Christmas!!! Only 10 days
& 4 hrs til Christmas Day 2009!
This is our Family Room fireplace,
lighted garland, wreath & stockings.
Does it make you feel Warm & Cozy?

I hope you've been enjoying the wonder
of the season...especially family &
friends...I have..We had a great time
at the boutique...Saw old friends &
made new ones!!!

As soon as santasgiftshoppe was over
we had to tear down & rearrange for our
annual Christmas Party (our 20th this yr)
So it's been a hectic few weeks...

I thought I'd give you a look at some of
the vignettes (in our home) in hopes to
inspire you as to some simple things that
you can do to bring a big impact into your
own home.

This is a favorite wall of mine..The Gingerbread
wall..
This is a lighted garland strung over the China
cabinet that is filled with A Christmas Dish
Collection. Some special Christmas items are atop
the China cabinet.
This home "Believes" I love that saying..
and ours does!!!
More Gingerbread men..
They are a favorite of mine, too!!
Above is an idea that is so simple...To change the
"look" of your Kitchen into a "Christmas Kitchen"
just make or buy RED curtains & instantly you have
changed the atmosphere to "Christmasy."
And last on the tour today is the bath.
Why shouldn't it look "Christmasy"
too??? All we did is put a poinsettia plant,
a Christmas Tree & a quilt wall hanging...
Plus on the wall (you can"t see) is our
"Elf Clock" easy to make out of card
stock...Their fun & cute!!
COME BACK SOON!! The RECIPE for
"The Chocolate Tower" Christmas
Dessert....will be on the blog!! You'll
really want to try this one!!

Monday, December 7, 2009

Winner of the Giveaway........is

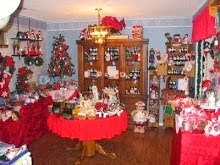
Here are some photos of Santa's Gift Shoppe
Boutique we had Fri/Sat....It was Wonderful!!!!
Hope you had a chance to be a partaker of this
fun boutique!! It was great to meet New friends
& have reunions with friends we haven't seen for
a while!!!!

But first I'd like to Congratulate....
Jennifer from Fresno, California....
as the most recent winner in our Giveaway!!!!

She received a beautiful gold charger w/the
three wisemen & a wonderful saying on it...
She was really happy to receive it as she
finished her shopping @ Santa's Gift Shoppe....

Back to your Tour.....Below is a pic of the
"Contemporary" Section or Black & White
Section of the Boutique...I really had fun
setting it up!! Some of my favorite things were
the Aprons & the "Kiss the Cook" plates...
they also were fun to make...

A friend of mine had a great idea!!! Give the
"Kiss the Cook" plates to the husbands
& the aprons to their wives!!! (with recipes)

********I think after the new year begins
they will be available to buy from the blog...
You'll have to keep checking back as
to when I start getting that all pulled
together!!!!


This is the kitchen filled with breads, candies,
Cookies, & Jams..


The above 2 pics are some of the great gift ideas
we had for you...Note: The Nativity with tiny lights
behind the Glass...Gives a great effect!!

These are some of the Italian Stones (in various
shapes & sizes & different sayings) A Great Gift
for Birthdays, Anniversaries, Weddings, any
occasion...

I absolutely love these aprons...They were in
all colors for children & adults.....There are only
a few left...They went flying off the shelves.....

These are some pics of "Stackers", blocks &
Chargers with the vinyl sayings on them...
They are such a Hit!!


This is looking into the kitchen where there
was such a variety to choose from!!!


Below is the jewelry Section...With Swarovski
accented jewelry....sparkling!!

Below we look at the Family Room filled with
Chargers, ornaments of all kinds, Glass, novelty
items & fun stocking stuffers....
And the popular polka-dot hair bows, & flowers!!!
Always adoreable on our little girls or grand-
daughters!!!


And last..The Giveaways!! Below are the great
Giveaways we had at Santa's Gift Shoppe...
They went to 6 Lucky people....
Hope you had fun on our Virtual Tour
of Santa's Gift Shoppe!!!! Come back & see
us very soon... We love giving you ideas to
make your holiday more memorable.....